

Imagine you’re on your way to the grocery store after a fun weekend with the family when your phone slips from your hand. It hits the asphalt, cracks beyond repair, and then lands in a puddle. Suddenly, everything changes.
In an instant, photos, videos, and messages from that weekend are gone because there was no recent backup. Worse still, water damage makes recovery impossible. At that point, the loss becomes permanent.
Unfortunately, situations like this happen every day. That is why backing up your cellphone regularly turns bad luck into a manageable problem instead of a worst-case scenario.
Cell phones are especially vulnerable because people carry them everywhere. As a result, the risk of drops, theft, or damage increases. On top of that, limited storage can eventually stop you from taking photos, saving videos, or downloading new apps.
The good news is that the two most popular types of phones, iPhones and Androids, offer multiple backup options. With the right setup, protecting your data only takes a few minutes.
Below, you’ll find clear guidance on when and how to back up your cellphone, along with simple steps to restore it when needed.
Table of Contents:
How often should I backup my cellphone?

Much like backing up your laptop or computer, backing up your cellphone regularly is ideal. But, much like backing up your computer, it is often hard for people to remember to do it.
Below is a quick guide of key times when you should update your phones if you can’t remember to back up regularly:
- Before major OS updates
- Before downloading apps
- After important moments or milestones
- Before you reset your phone
- Before your phone gets hacked (because one never knows when this will occur, a regular backup is greatly encouraged so at any point you can reset your phone without risking your data)
- Before your phone gets bogged down by malware or viruses (because one never knows when this will occur, a regular backup is greatly encouraged so at any point you can reset your phone without risking your data)
- Before accidental damage occurs
- Before selling or giving your phone to anyone else
- Before you upgrade to a new device
How to backup your iPhone or iPad
There are two main ways to backup your iPhone or iPad: physically or manually or on a Cloud service.
How to Backup iPhones or iPads on Mac
While historically Apple used to make consumers use iTunes to create all their backups, anyone running MacOS 10.15 or now has a more direct, easier way:
- Connect your iPhone or iPad to your Mac with the data cable provided with your iPhone (or any cable you’ve been using to connect your Mac to your iPhone)
- Go to your dock, and click ‘Finder’
- At the top of the Finder Window, click ‘General’
- Select “Back up all of the data on your iPhone to this Mac”
- Click ‘Back Up Now’
How to Backup iPhones or iPads on Windows
- Connect your iPhone or iPad to your Mac with the data cable that is compatible between your iPhone and PC
- Open to iTunes app on your PC, click the ‘iPhone’ or ‘iPad’ button on the top left of the window
- Select ‘Summary’
- Select ‘Back Up Now’ under ‘Backups’
How to Backup iPhones or iPads to iCloud
- Unlock your iPhone or iPad
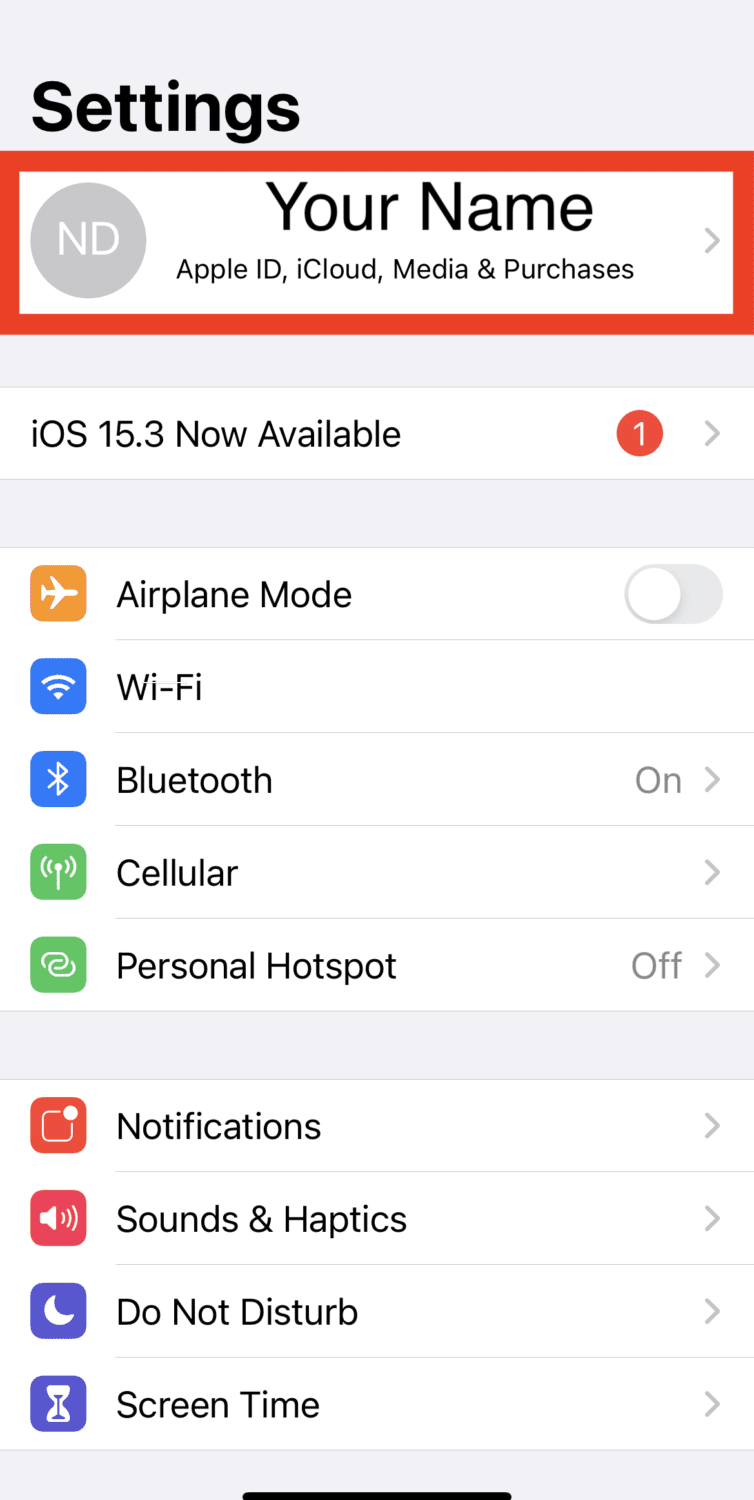
- On the home screen, tap ‘Settings’ (screens below will slightly be updated based on updated iOS)

- Tap the Name of the device (usually your name or Apple ID) at the very top of the ‘Settings’ menu
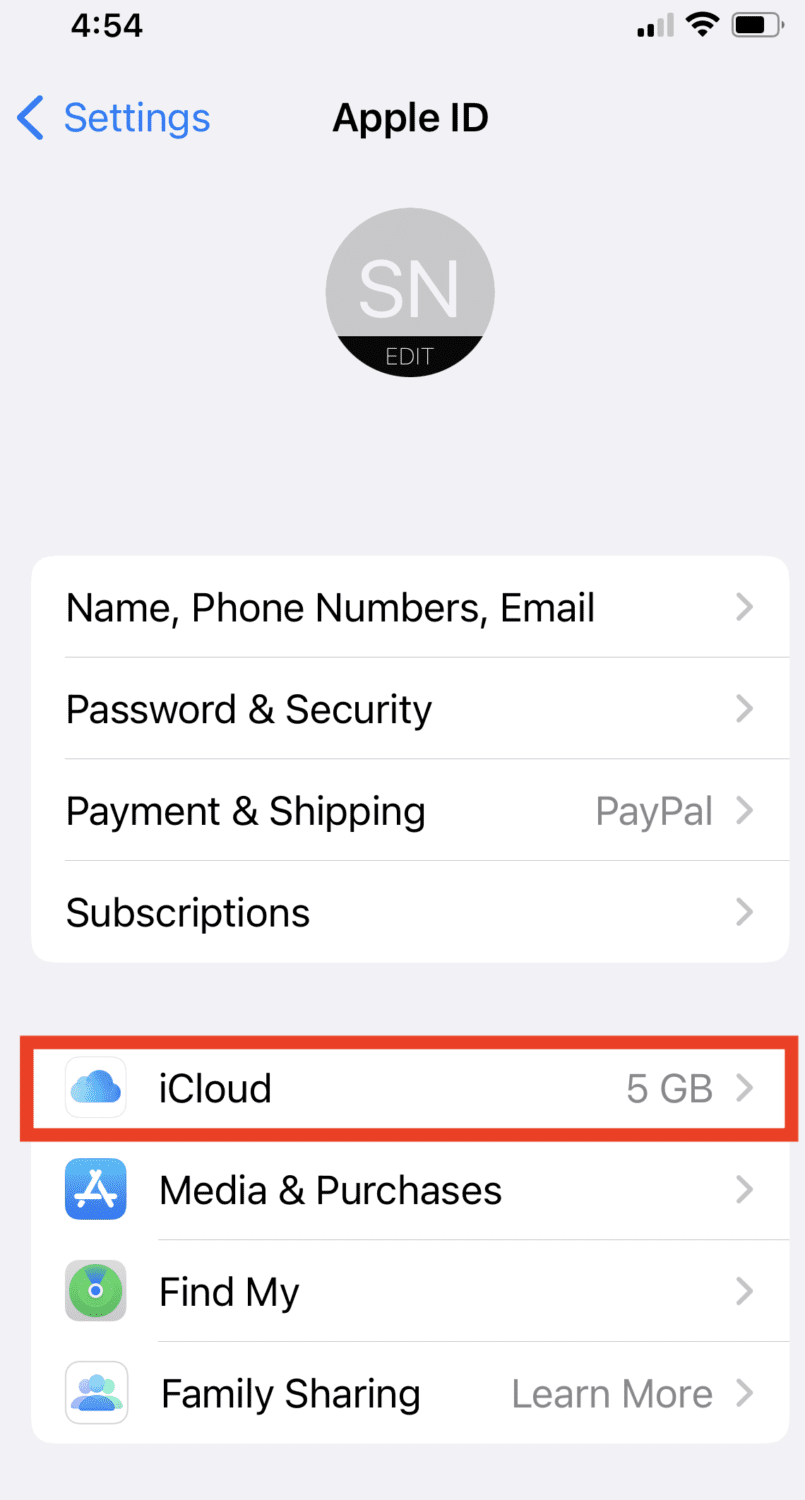
- Tap ‘iCloud’
- Tap ‘iCloud Backup’
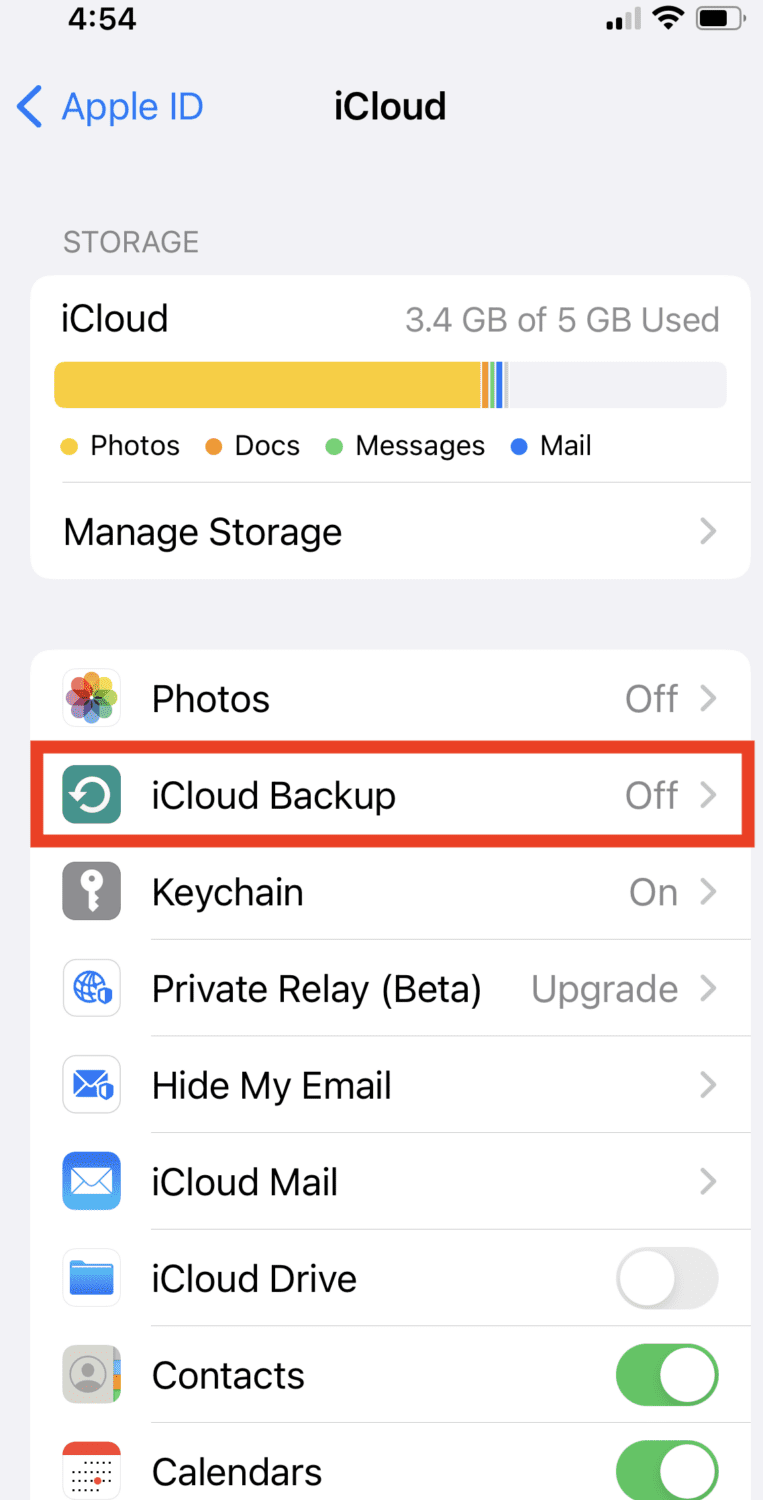
- Tap the toggle to turn ‘iCloud Backup’ on (it should be green)
![]()
- To manually perform a backup now, tap ‘Back Up Now’
Once iCloud is setup, it will automatically back up the following any time it is connected to the internet:
- App data
- Apple Watch backups
- Device settings
- Home screen and app organization
- iMessage, text (SMS), and MMS messages
- Photos and videos on your iPhone, iPad, and iPod touch
- Purchase history from Apple services, like your music, movies, TV shows, apps, and books
- Ringtones
- Visual Voicemail password (requires the SIM card that was in use during backup)
Please note that whatever you toggled on in the main iCloud menu (such as iCloud photos or Contacts) is information already stored in iCloud and is not part of the iCloud backup. That information is already kept up-to-date on all your devices sharing the same Apple ID.
How to restore your iPhone or iPad
There are two main ways to restore your iPhone or iPad: physically or manually or on a Cloud service.
Use a Mac to restore an iPhone or iPad
- Connect your new or newly erased iPhone or iPad to your Mac with the data cable provided with your iPhone or iPad
- On your Mac, go to your dock, and click ‘Finder’
- On the left sidebar of the ‘Finder’ window, select the phone you want to restore the backup to then select ‘Trust’
- On the phone’s or iPad’s welcome screen, click ‘Restore from this backup’
- Choose the backup from the list, and click ‘Continue’
Restore an iPhone or iPad using a Windows PC
- Connect your new or newly erased iPhone or iPad to your Windows computer
- Open to iTunes app on your PC, click the ‘iPhone’ button on the top left of the window
- On the phone’s or iPad’s welcome screen, click ‘Restore from this backup’
- Choose the backup from the list, and click ‘Continue’
With iCloud, restore an iPhone or iPad wirelessly
While historically Apple used to make consumers use iTunes to restore all their backups, anyone running MacOS 10.15 or now has a more direct, easier way:
- Turn on your new or newly erased iPhone or iPad
- Choose your preferred language and region
- Click ‘Set up Manually’
- Click ‘Restore from iCloud Backup’
- Follow the onscreen instructions
Please note you will likely be asked for your Apple ID. It should be the same email and password you used to access whatever phone you made the backup to iCloud.
How to backup your Android
Much like iPhone users, Android users have options in terms of how they can back up their phones. Two main options include a physical backup to your Windows or Mac computer or via the cloud.
Use a Windows computer to back up an Android phone
- Connect your phone to your Windows computer with your USB cable
- Open notifications on your phone by dragging it down the menu
- There should be a notification from ‘Android System’ stating ‘Charging this device via USB,’ tap it
- Under the ‘Use USB for’, click ‘File Transfer’
- In the next window to pop-up, or ‘This PC’ window, click the phone you want to back up (listed in the left pane)
- You should see folders and files on your phone listed. Highlight the folders or files you want to transfer, right-click, then select ‘Copy’
- Choose a folder on your computer you want to save this data, and right-click then paste.
On a Mac, copy Android files using Android File Transfer
- Download the official Android File Transfer app to your Mac (https://www.android.com/filetransfer/)
- Connect your phone to your Mac computer with your USB cable
- The Android File Transfer app window should automatically open on your Mac with a list of folders and files on your phone
- Copy and paste (right-click) or drag and drop files and folders you want to save onto your Mac
With Google Drive, create automatic Android backups
In order to backup with Google Drive, you will need a Google account.
- On your Android main screen, go to ‘Settings’
- Click ‘Google’
- Click ‘Backup’
- Under your Google account info, click ‘Backup to Google Drive’ (it will say Google One on some devices) and click the toggle on
- Under the ‘‘Backup to Google Drive’, tap on the ‘Back up now’ button
Please note that you can select what types of data will be backed up in the section below (under ‘Backup details’).
How to Restore an Android device
There are two main ways to restore your Android: physically or manually or on a Cloud service.
How to restore Androids on Windows
- Connect on your new or newly erased Android device to your Windows computer with the manufacturer-provided USB cable
- Tap ‘Charging this device via USB’
- Tap ‘Open USB for’
- Click ‘File Transfer’
- A window will pop up
- Drag the files you want to transfer to your Android from your computer to your new Android device
- Make sure to properly eject your device before you detach your phone from the cable or computer
How to restore Androids on Mac
Because you’ve used a Mac to back up your Android device previously, you should have the Android File Transfer app downloaded on your Mac already. If not, go back to ‘How to Backup your Android on Mac’ section (above) and download the app.
- Open Android File Transfer
- Connect on your new or newly erased Android device to your Mac with the manufacturer-provided USB cable
- Tap ‘Charging this device via USB’
- Tap ‘Open USB for’
- Click ‘File Transfer’
- A window will pop up
- Drag the files you want to transfer to your Android from your computer to your new Android device
- Make sure to properly eject your device before you detach your phone from the cable or computer
How to restore Androids via Google Drive
- Turn on your new or newly erased Android
- Choose the language if you prefer on the welcome page and tap ‘LET’S GO’
- Click ‘Copy Apps and Data’
- Click ‘Copy Your Data’
- (Make sure you’re connected to the internet – if you haven’t already done so open Connect to Wifi page)
- Click ‘Bring Your Data From’ then select ‘Backup from Cloud’
- Sign into your Google Account where your original Google Drive backup is stored
- Click ‘I Agree’
- Click ‘Backup to Restore’
- Select the data files you want and click ‘Restore’
How to backup and restore your Samsung
Please refer to these instructions
Related Links:
- How to back up your Windows or Mac computer
- How to determine how much storage is needed to back up your computer
- How to backup photos the right way
Kurt’s key takeaways
Backing up your phone often feels optional until something goes wrong. When a cracked screen, water exposure, malware, or a lost device strikes, years of photos, messages, and important files can disappear in seconds. As a result, the stress can feel instant and overwhelming. Fortunately, regular backups completely change that outcome. Instead of permanent loss, recovery becomes a simple and manageable process. In fact, restoring your data often takes only a few taps. Regardless of which device you use, including an iPhone, Android, or Samsung phone, backup tools are already built in and easy to automate. For that reason, setting a routine, confirming backups are working, and reviewing settings after major updates is essential. Ultimately, a few minutes of preparation today can save hours of frustration later.
When was the last time you checked that your phone backup actually worked? Let us know in the comments below.
Copyright 2026 CyberGuy.com. All rights reserved. CyberGuy.com articles and content may contain affiliate links that earn a commission when purchases are made.
🎙 Now Streaming: My New Podcast: The CyberGuy Report
Kurt’s Top Deals
Deals move fast and inventory can be limited, so don’t wait too long.
| 🔥 Editor’s pick  Summer entertaining Ninja SLUSHi Machine (26% off) Frozen drinks and slushies at home in minutes. | |
| 💰 Top deal  Outdoor essential TYPEC Solar Bug Zapper (36% off) Solar-powered bug zappers for patios and camping. |

