If you’re anything like me, you probably have tens of thousands of emails in your Gmail inbox. Most of them are probably read, and some are probably unread, but regardless, they are all sitting in your inbox, taking up space.
You only get 15GB of storage for free with Gmail, and while 15GB may seem like a lot, emails can add up quickly, especially if you receive emails with attachments such as images or videos. A clean inbox is the first step to a more organized personal and professional life. Cleaning up your Gmail inbox can be done in a few easy steps. Let’s go over ten different methods to reclaim your Gmail inbox.
GET SECURITY ALERTS, EXPERT TIPS – SIGN UP FOR KURT’S NEWSLETTER – THE CYBERGUY REPORT HERE
Tip #1 – Delete large attachments
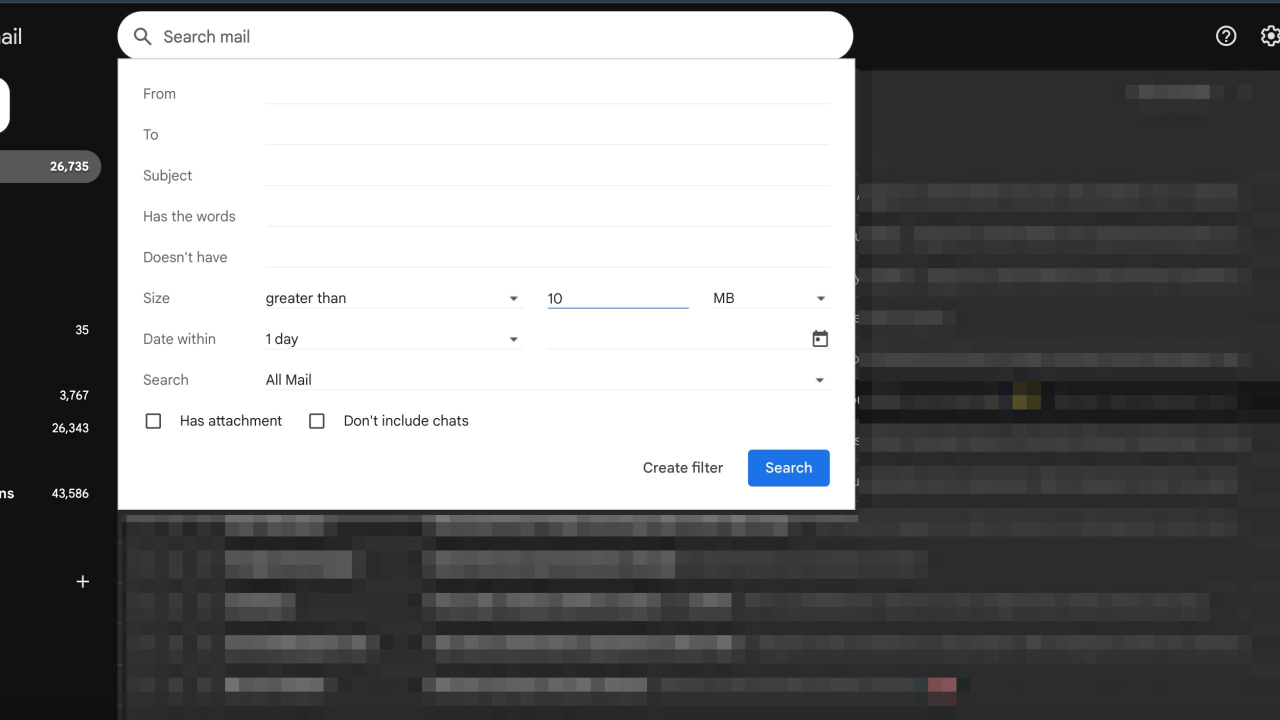
Emails with large attachments, such as video or audio files, can take up a lot of space. Luckily, Google makes it easy to search for and find emails with large attachments buried in your inbox. From your Gmail search bar, you can search for emails larger than 10MB, showing you all emails in your inbox with an attachment larger than 10 megabytes. This will help you delete emails with large attachments you no longer need from your inbox. To delete the email, all you have to do is:
- Open Gmail and type size: 10MB in the search bar.
- Select the emails you want to delete by clicking the checkbox next to each email.
- Click the trash icon at the top of the page to move the selected emails to the Trash.
- Empty the Trash to permanently delete these emails and free up space.
Tip #2 – Delete entire categories
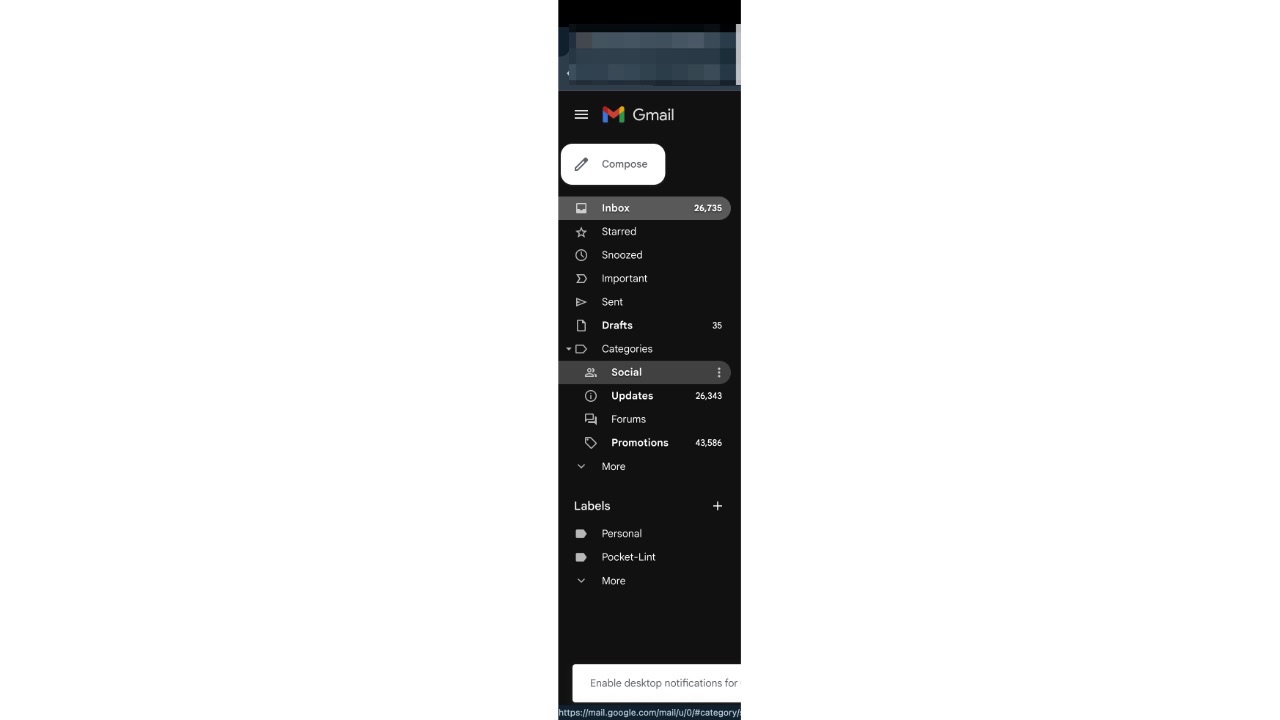
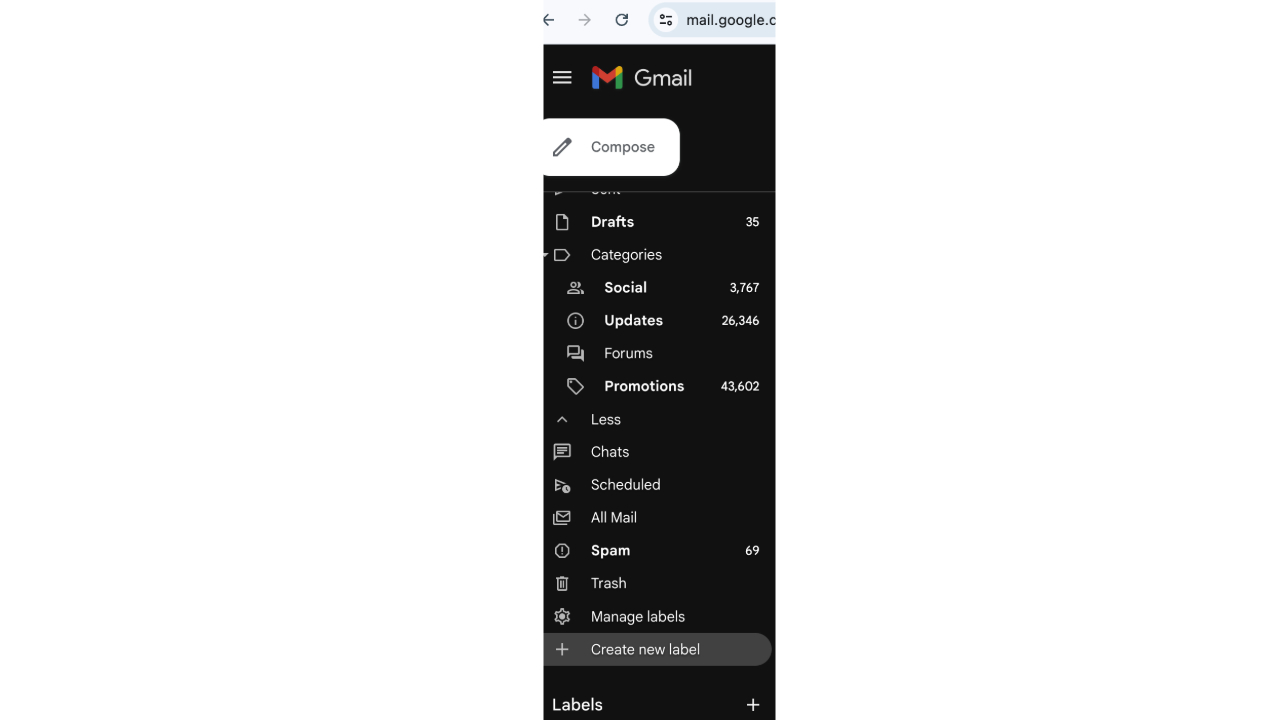
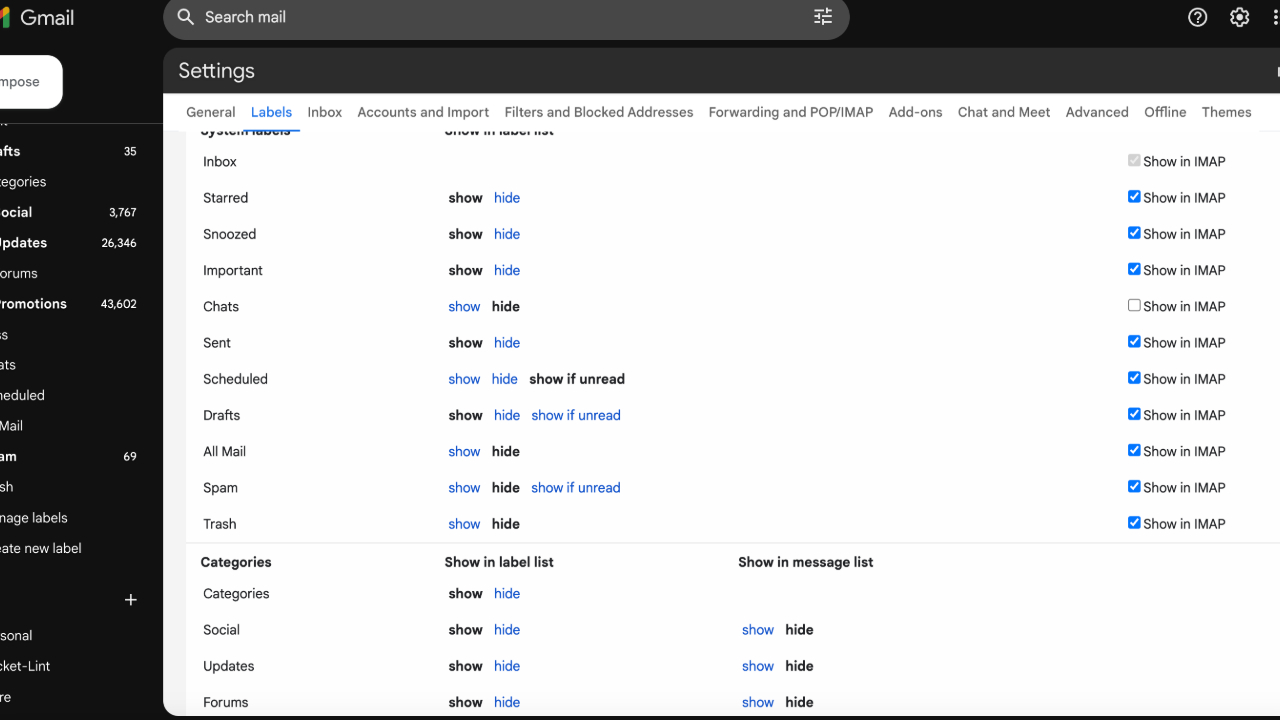
By default, Gmail gives you several categories to help organize your inbox. You should have category tags for primary, promotions, and social.
- If you click Inbox in the left pane in Gmail, you should see a column that shows which categories you are active in.
- You can add or remove categories from here, and I recommend using category tags relevant to your life.
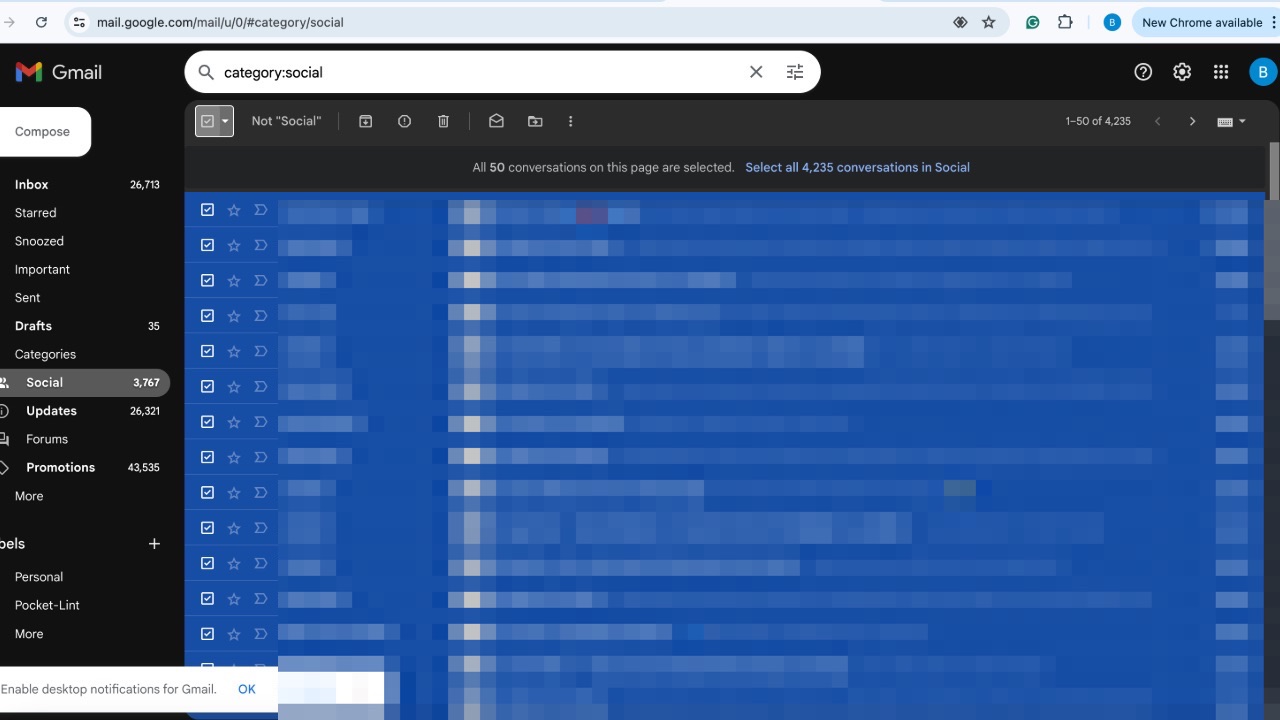
- Once you’re ready to clean out a category, you can click the box in the upper right corner to select all emails, allowing you to delete them quickly.
HOW TO FILTER AND SORT EMAILS ON YOUR IPHONE AND IPAD
Tip #3 – Unsubscribe from email lists
Remember that app you signed up for ten years ago and still receive daily emails about? You’re not alone. Most of us get emails from a mailing list we subscribed to long ago that is no longer relevant to us. The simple solution here is to unsubscribe. Here’s how to Unsubscribe:
- Look for the unsubscribe link: Most promotional emails include an unsubscribe link at the bottom. Click it, and follow the instructions to remove yourself from the list.
- Use email management tools: Unsubscribing from multiple email lists can be a time-consuming process. Luckily, a helpful tool called Clean Email will do the hard work for you.
- Mark as spam: If you can’t find an unsubscribe link, mark the email as spam. This will help your email provider filter out similar messages in the future.
- Update your preferences: Some emails come from services you still use but don’t need frequent updates from. Check if you can update your email preferences to receive fewer notifications.
Tip #4 – Block unwanted senders
As a tech reporter, I receive many emails from sales reps from various companies. Many of these emails come from companies and senders outside of my scope for the things I typically cover, and unfortunately, I have had a few salespeople who wouldn’t leave me alone. If you have a similar issue, I recommend just considering blocking them.
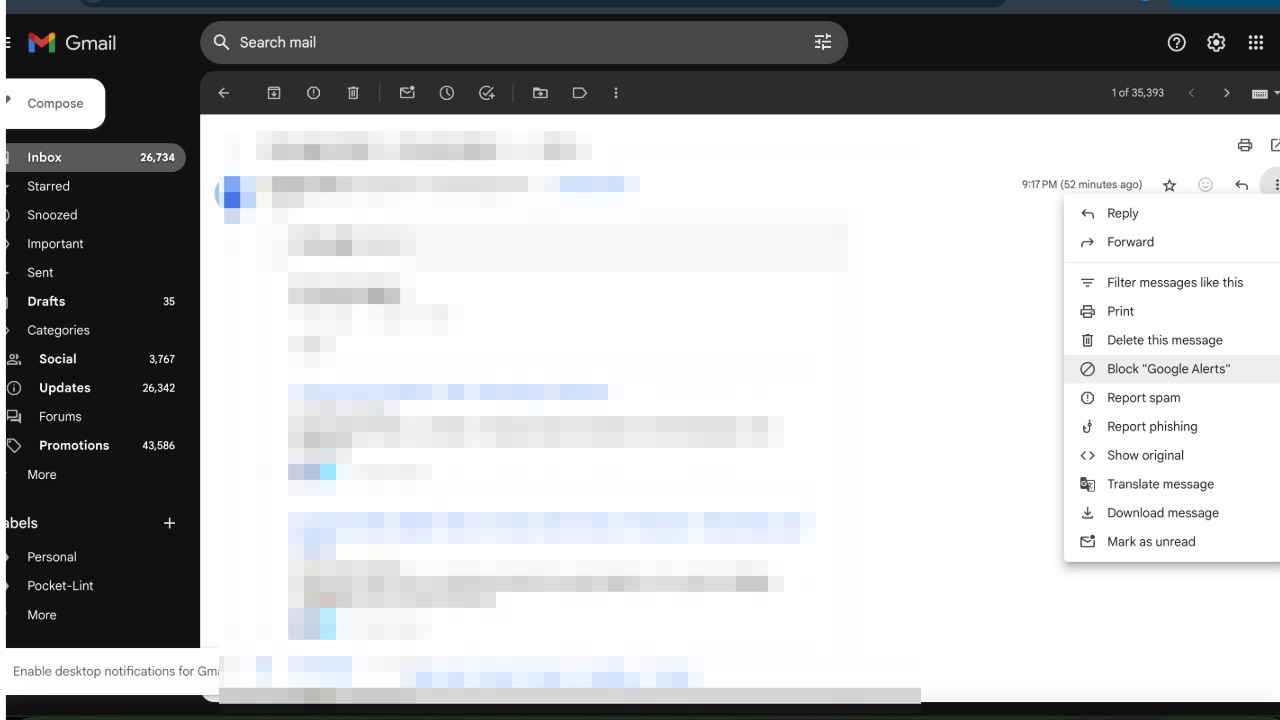
- All you need to do is open any message from a sender you want to block; on the right side of your screen, click the ellipses and select block.
HOW TO CREATE A QUICK ALIAS EMAIL EMAIL ADDRESS
Tip #5 – Delete emails by sender
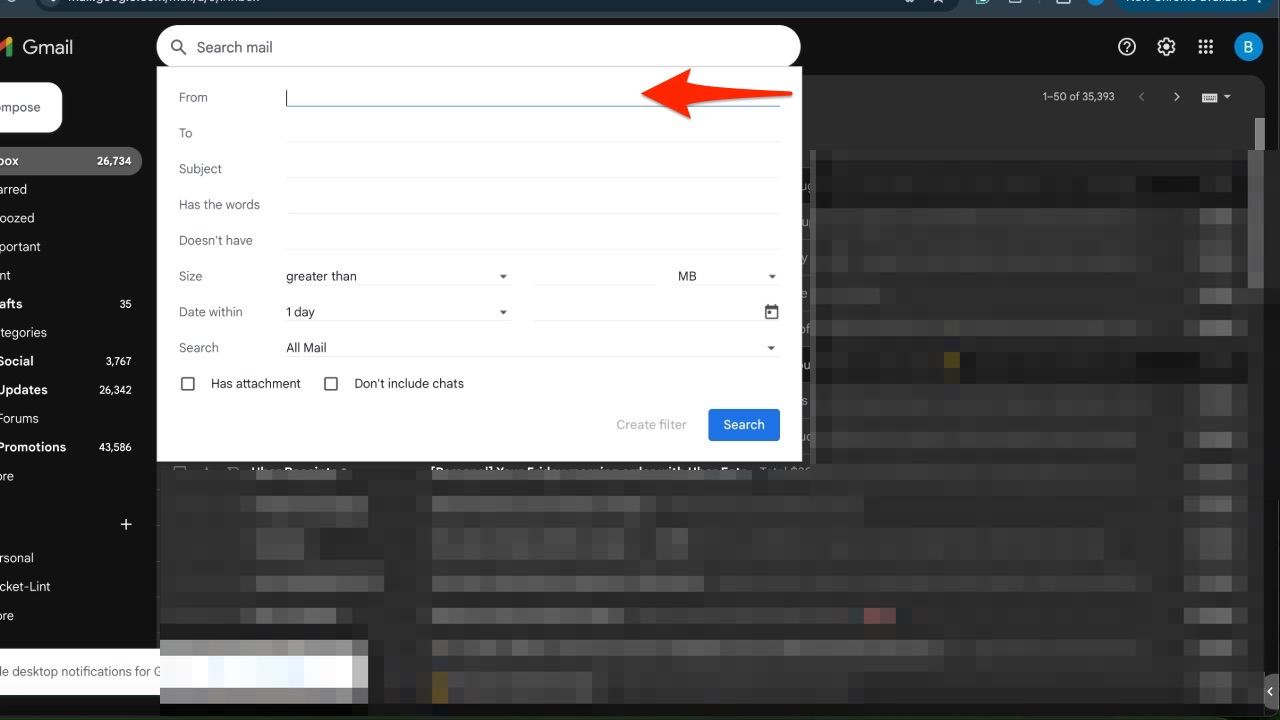
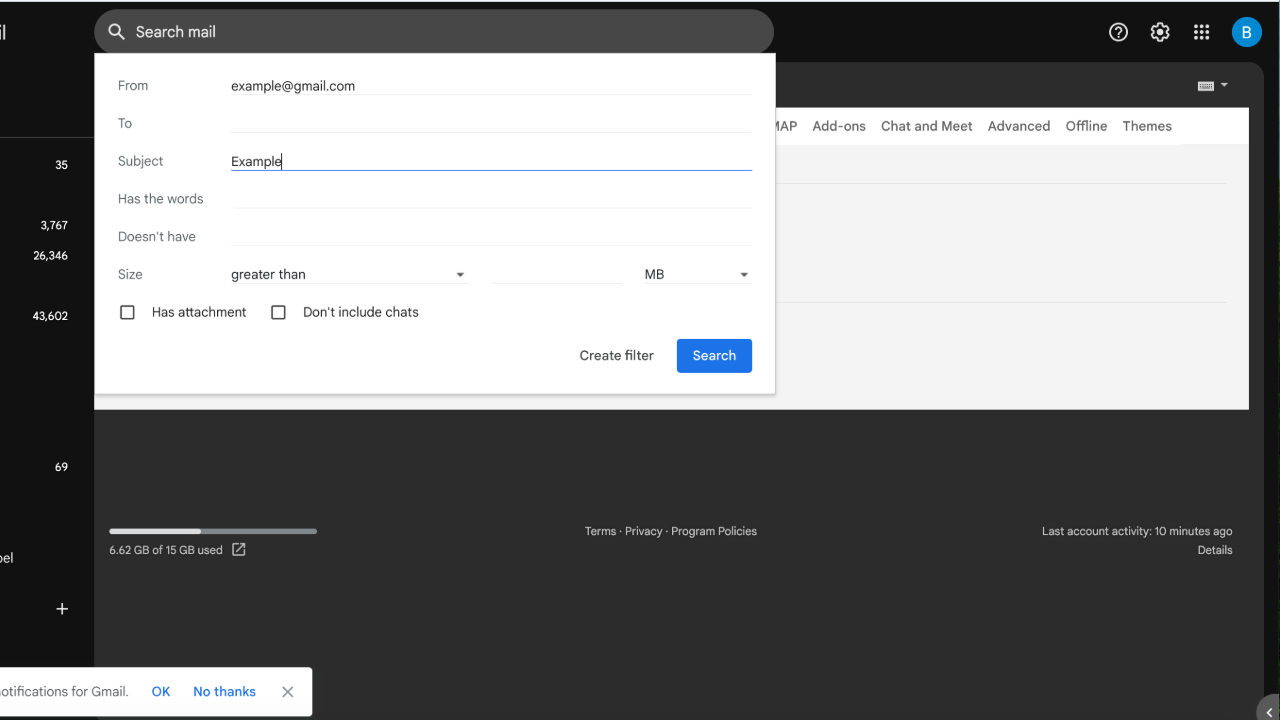
An easy way to clear up some space quickly in your Gmail inbox is to delete old emails from the sender. Do you have a client you no longer work with, or would you want to delete all social media notification messages? Using Gmail search, you can filter all emails in the from section to delete emails from a particular sender.
- All you need to do is click the toolbar on the right side of the Gmail search box and input the sender’s name in the From section.
- Then, click the search button. This will display all emails from that sender.
- You can then select all these emails by clicking the checkbox at the top of the list.
- Finally, click the trash icon to delete them.
Tip #6 – Delete emails by date
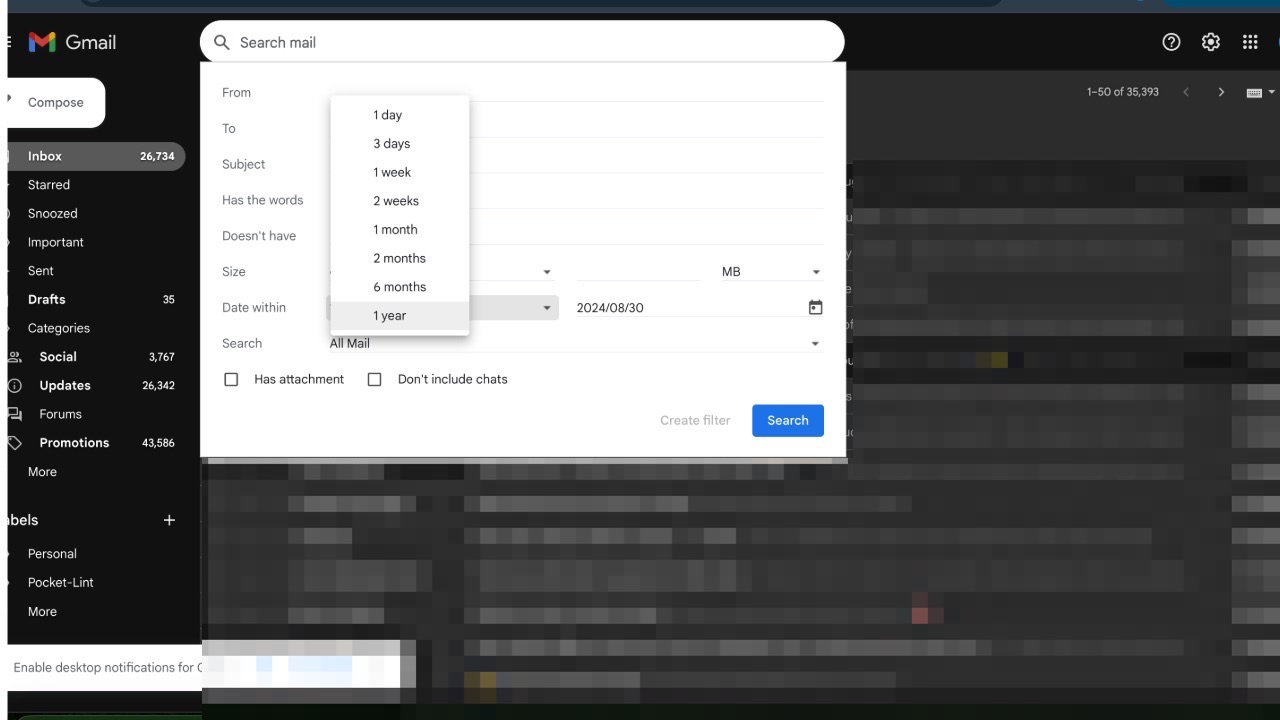
You can sort emails by date and delete them in the same search box form. There’s a good chance you don’t need those emails still in your inbox after five or ten years, so why not search by date and delete them?
Just like you did with the deleting emails by sender section, all you need to do is click the toolbar in the Gmail search bar, and you can sort emails within a specific time in the form. Here’s how to do it.
- Select the date range you want to delete emails from. For example, you can type before: YYYY/MM/DD or after: YYYY/MM/DD in the search bar to specify the date range.
- Once you have your search results, click the checkbox at the top left to select all emails in the search results.
- Finally, click the trash can icon to delete the selected emails.
Tip #7 – Delete emails by subject
An easy way to quickly clean up your Gmail inbox is to delete emails with specific subject lines. Gmail’s advanced email search also has a line allowing you to search for emails by particular phrases or keywords in the subject line. Make sure to use quotation marks around any words you are searching. You can quickly find and delete emails this way, and it’s one of my favorite ways to clean up an inbox. Here’s how to do it.
- Log in to your Gmail account on your computer.
- At the top of the page, you’ll see a search bar. Type in the subject line you want to search for, enclosed in quotation marks (e.g., “Meeting Notes”).
- Gmail will display all emails with that specific subject line.
- Click the checkbox at the top left corner of the email list to select all emails on the current page. If you have more emails than what is displayed on one page, you will see an option to select all conversations that match the search.
- Click the trash can icon to delete the selected emails.
Tip #8 Organize your Gmail inbox with labels
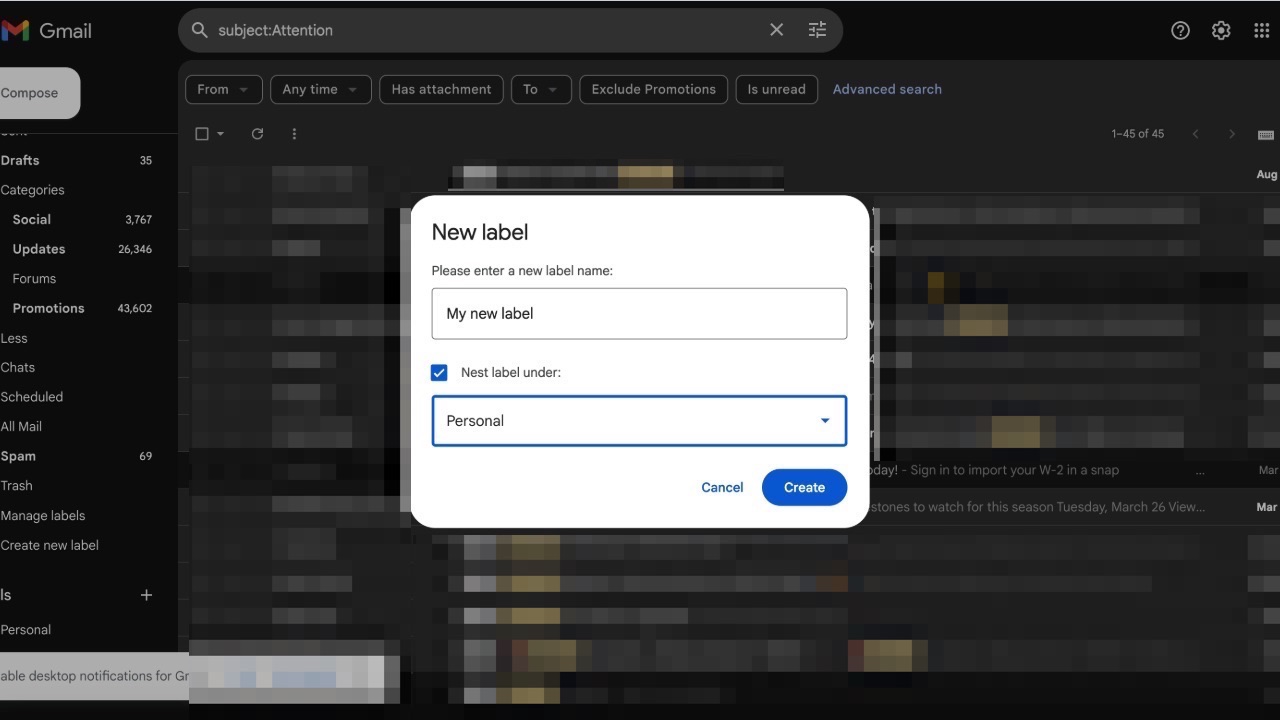
Labels are a great way to organize your Gmail inbox. You can easily create a new label by clicking on the Create a new label option on the left sidebar within Gmail. I use labels to organize my most valuable emails, typically work emails, in my inbox. I also use Gmail’s label system to automatically filter my emails, which I’ll tell you more about in the next tip.
Create a new label:
- Open Gmail.
- On the left sidebar, click on “Create new label.”
- Enter a name for your label (e.g., “Work Emails”)
- Then, click “Create”.
Apply labels to emails:
- Select the emails you want to label by checking the boxes next to them.
- At the top of the page, click on the “Labels” icon.
- Choose the label you want to apply, or create a new one if needed.
Organize emails automatically:
- Use Gmail’s filter system to automatically label incoming emails.
- Click on the “Show search options” icon in the search bar.
- Enter your criteria (e.g., emails from a specific sender).
- Click on “Create filter.”
- Choose “Apply the label” and select the label you want to use.
- Click “Create filter”.
Manage Your Labels:
- To edit or delete a label, hover over the label name on the left sidebar.
- Click on the three dots (More) next to the label name.
- Choose “Edit” to rename or “Remove label” to delete it.
Tip #9 Make use of Gmail’s built-in organization features
Gmail has many organizational features that many users neglect. For example, within Gmail, you can star emails to mark them as important or color code folders of emails to stay on top of the organization. You can also mark important emails that need responses, and all of these features are just a simple click away from the advanced settings button within Gmail.
- Star Emails: You can star important emails to easily find them later. Just click the star icon next to the email. You can also customize the star system by going to Settings > See all settings > General > Stars.
- Labels: Labels are like folders but more flexible. You can create labels to categorize your emails. To create a label, go to Settings > See all settings > Labels > Create new label. You can also nest labels under other labels for better organization.
- Color Code Labels: To color code your labels, hover over a label in the sidebar, click the three dots, and select Label color. This helps you visually distinguish between different categories of emails.
- Filters: Filters automatically sort your incoming emails. Go to Settings > See all settings > Filters and Blocked Addresses > Create a new filter. You can set criteria like sender, subject, or keywords, and choose actions like applying a label, archiving, or deleting.
- Priority Inbox: Enable Priority Inbox to automatically sort your emails into categories like Important and Unread, Starred, and Everything Else. Go to Settings > See all settings > Inbox > Inbox type > Priority Inbox.
- Snooze Emails: If you need to deal with an email later, you can snooze it. Hover over the email, click the clock icon, and choose when you want the email to reappear in your inbox.
HOW TO USE SMART COMPOSE TO WRITE EMAILS FASTER ON GMAIL
Tip #10 – Create new filters
Gmail’s filter system automates organizing all the emails in your inbox. Once you’ve cleaned it out, this should help you keep it clean. Filters in Gmail allow you to automatically redirect emails once they hit your inbox, saving you the time and trouble of manually sorting through them. For example, you can create a filter that will send all newsletters from specific senders to a particular inbox, or you could create a filter that automatically sends emails from particular senders straight to the trash.
- To create a filter, type in a specific keyword you want to filter into the Gmail search bar and click on the filter symbol.
- Clicking the filter symbol will open a dropdown menu that you can use to refine your filter options.
- Once you’ve created your refinements, click the Create filter button.
Kurt’s key takeaways
Organizing your email inbox can be a lot of work, but luckily, as I’ve shown, Gmail makes it easy. If you feel overwhelmed by how much has accumulated in your inbox, don’t panic. Take a deep breath, and follow these steps in order. Hopefully, by the end of this article, you have thoroughly cleaned out your inbox and have now taken advantage of Google’s automation features to keep your unruly inbox organized.
What strategies have you found most effective for managing your email inbox, and do you have any additional tips or experiences to share? Let us know in the comments below.


1 comment
Excellent information! Thank you! I will definitely be using these tips to clean up my Inbox. ☺️