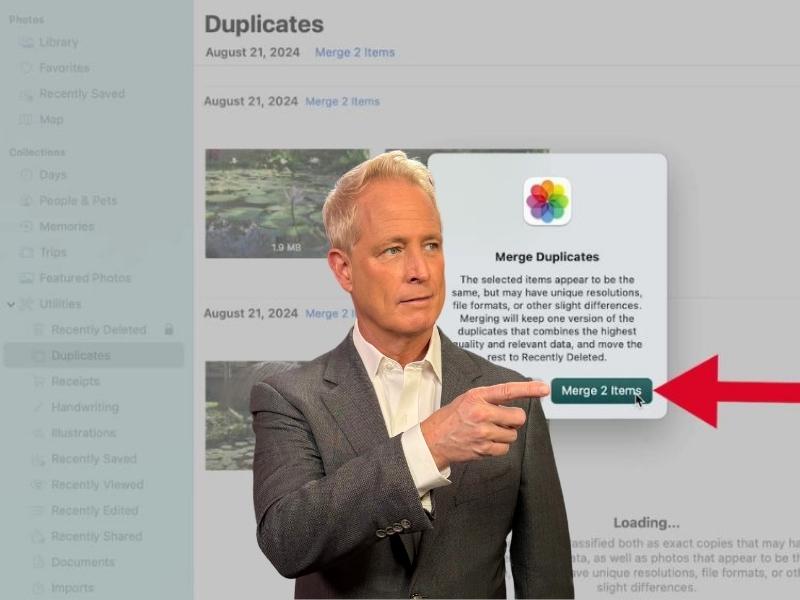



Are you tired of scrolling through your Mac’s Photos library only to find multiple copies of the same photo? Duplicate photos can clutter your storage and make it harder to find the memories you want to cherish. Fortunately, if you’re using macOS Ventura or later, Apple has made it easier than ever to find and merge these duplicates right within the Photos app. We’ll walk you through how to use the built-in Duplicates finder, as well as some alternative methods for those who need more advanced features. Plus, we’ll also offer some other tips to help you easily free up space on your Mac.

How to use the built-in Duplicates finder in the Photos App (macOS Ventura and Later)
If you’re using macOS Ventura or newer, Apple has added a Duplicates finder inside the Photos app. Here are the steps to find and merge duplicates in the Photos App on a Mac:
- First things first, open up your photos app.
- You can do this by clicking Finder in the dock at the bottom of your home screen.
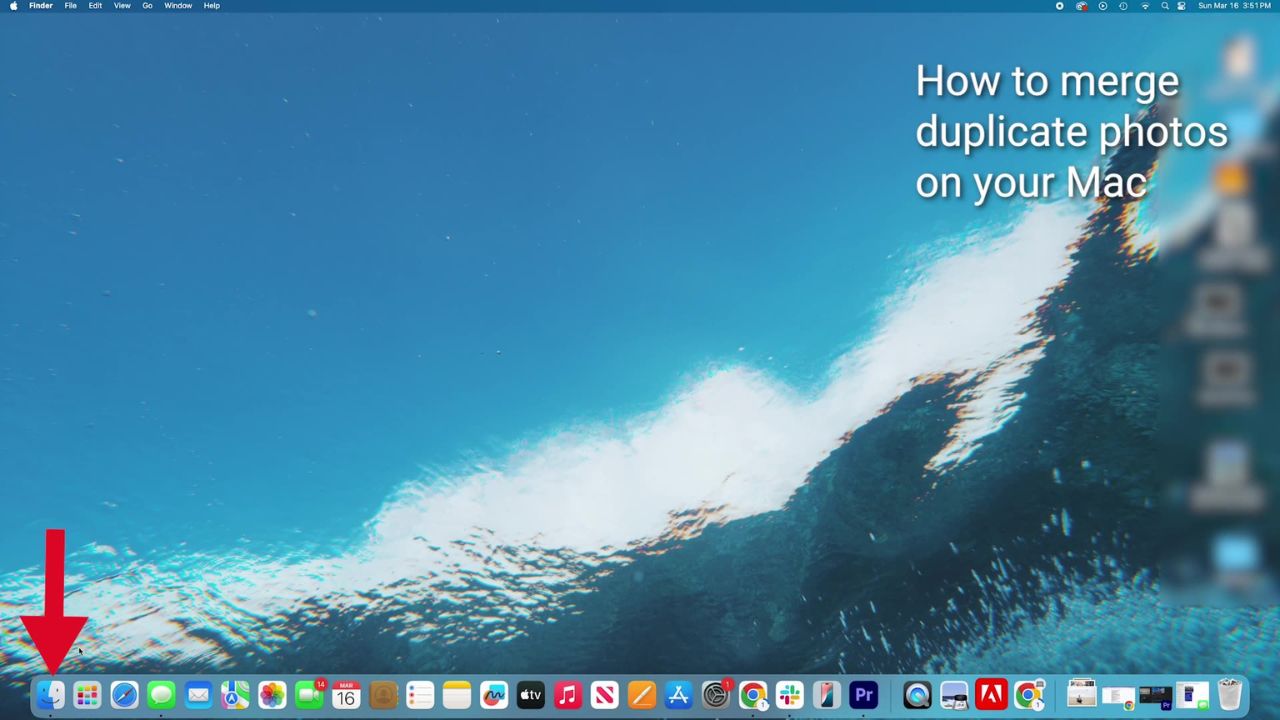
- Then, click Applications.
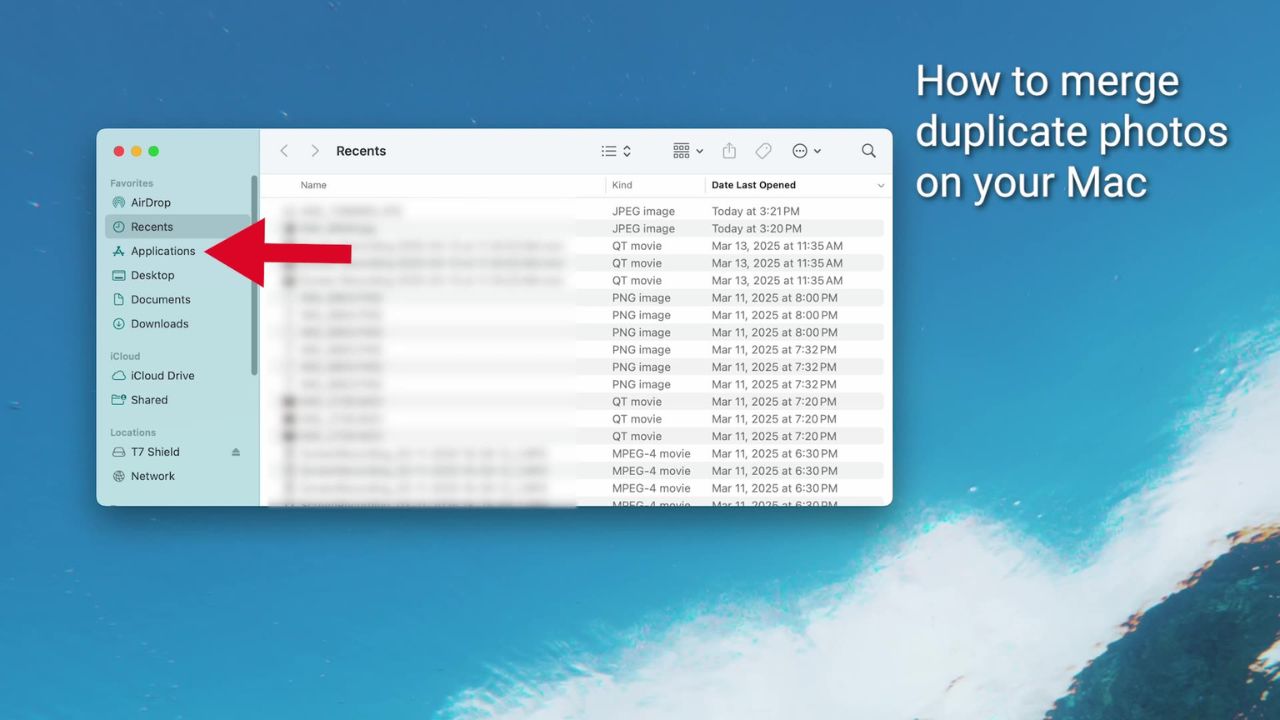
- Next, scroll down and click the photos app.
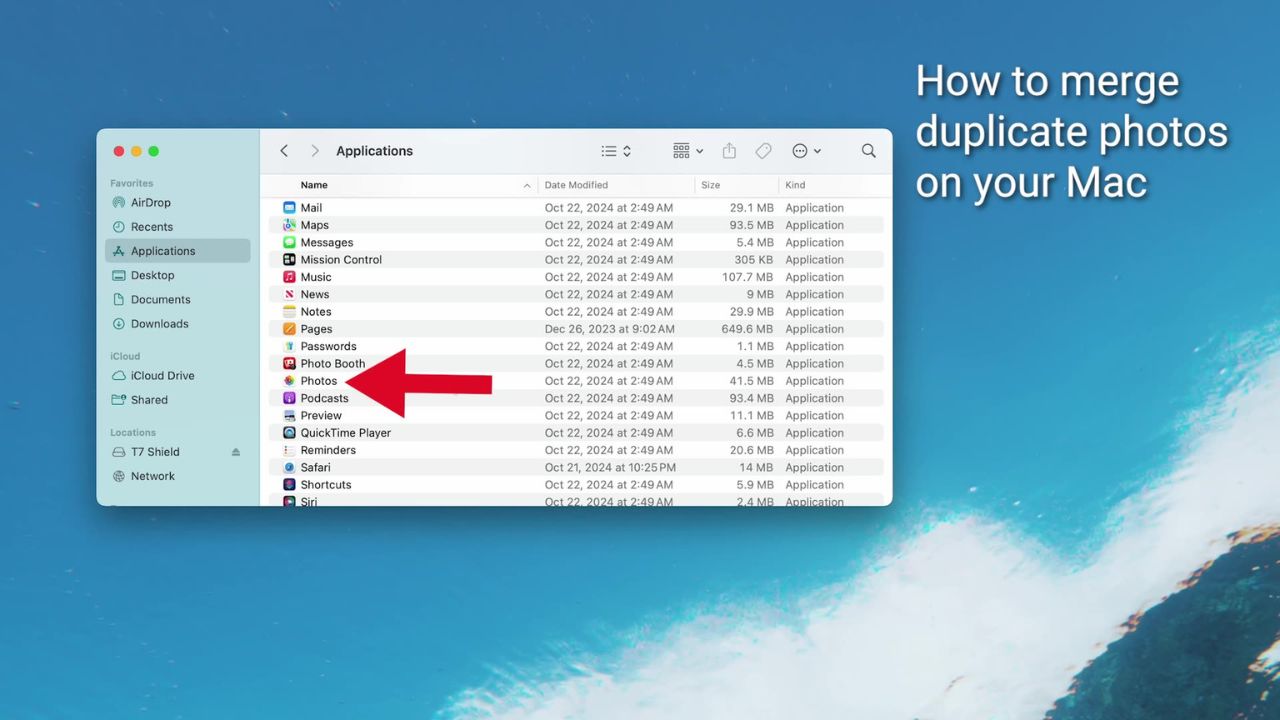
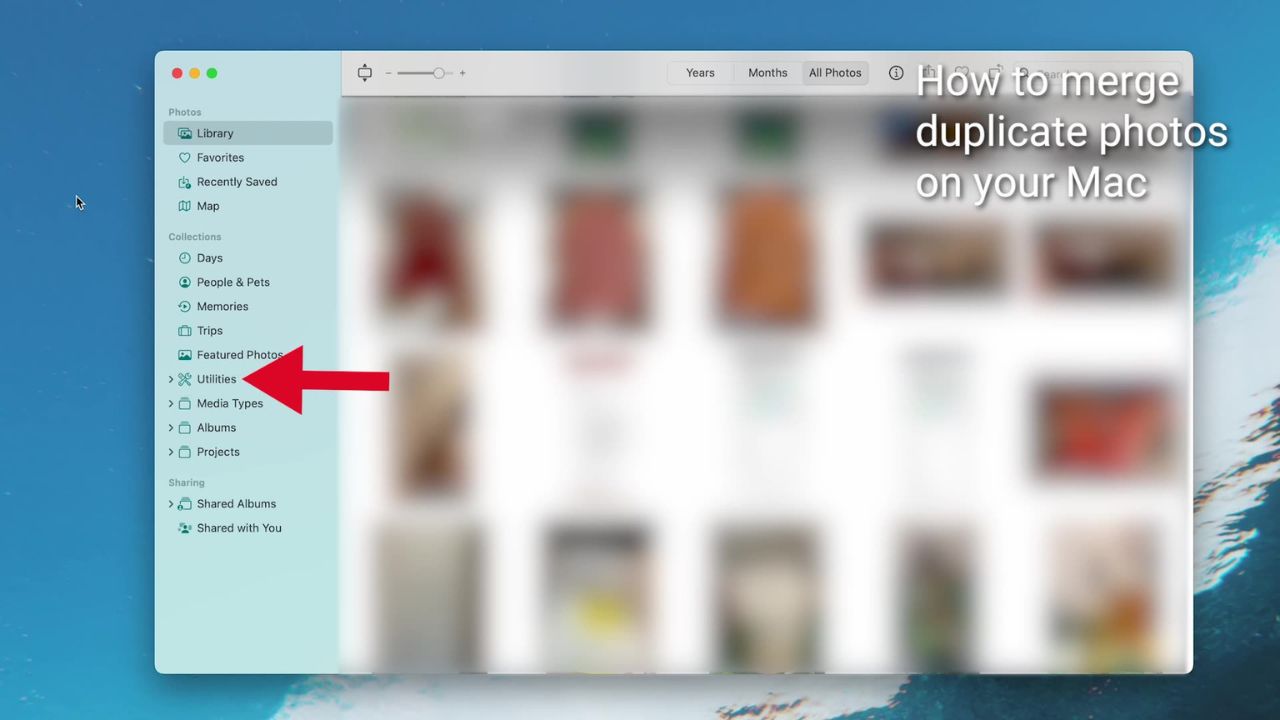
- On the left sidebar, click on “utilities.”
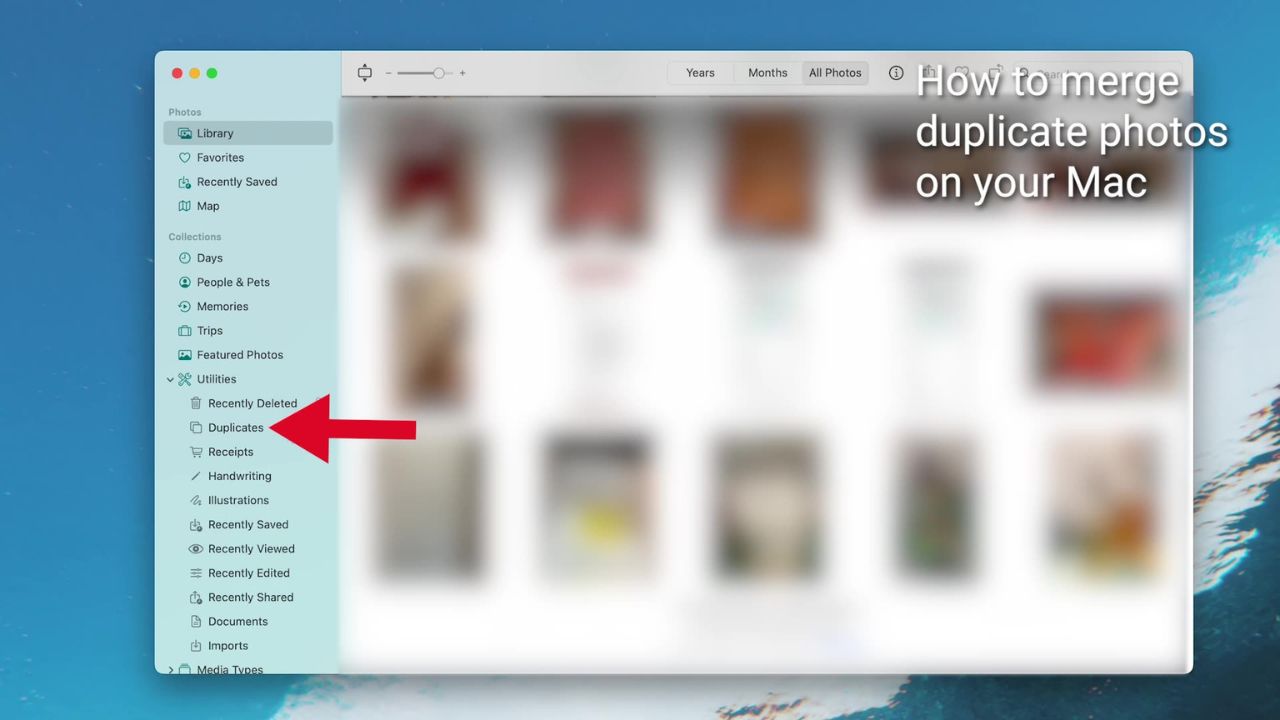
- Then click Duplicates.
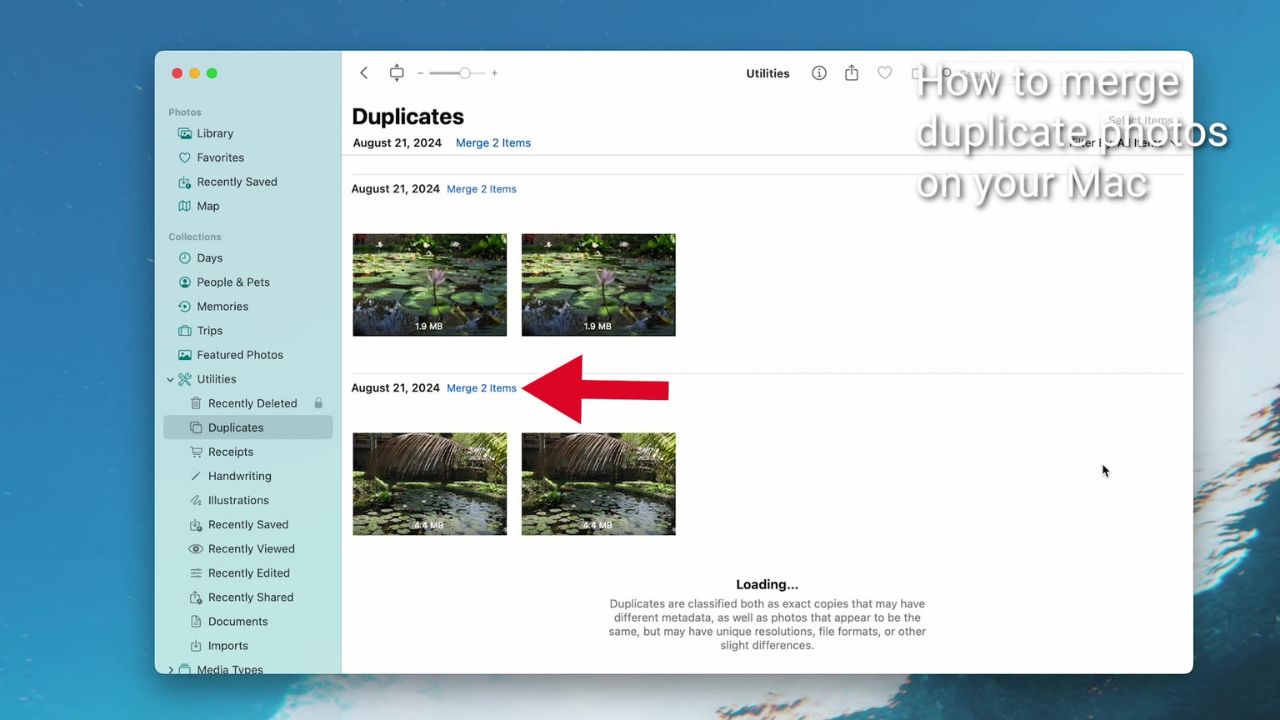
- If you have any duplicate photos, this will show up automatically. Once you’re in the duplicates section, you’ll see all the duplicate images the app has detected. Take a moment to review them.
- Next to or above each set of duplicates, you’ll see a “merge” button.
- When you click it, your Mac will keep the highest-quality version and say goodbye to the others.
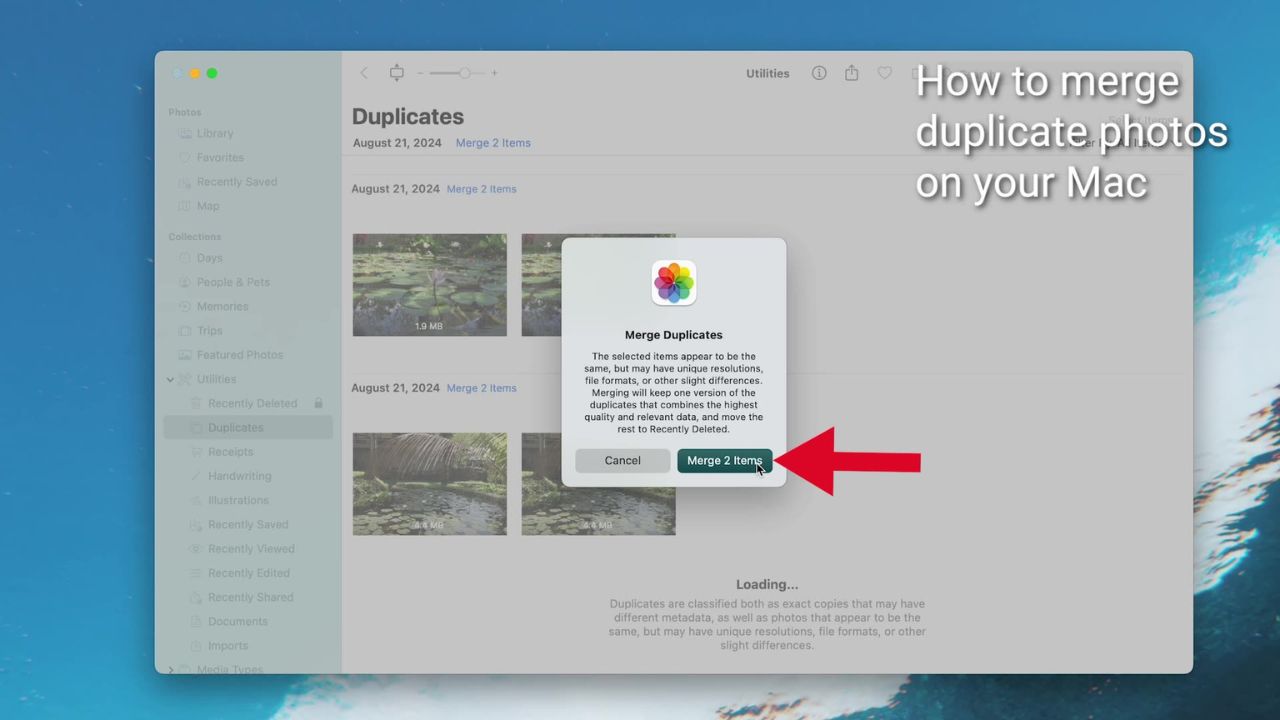
- It’ll ask you to confirm your decision.
- Go ahead and click it.
Just like that, you’ve cleared out all your duplicate photos. Now, you’ve just freed up some valuable space on your Mac, and your photo library is duplicate-free.
BEST ANTIVIRUS FOR MACS – CYBERGUY PICKS
Watch the latest episode of The CyberGuy Report.

Missed this event? Sign up via the registration form and see our live recording.
See Kurt’s latest Amazon picks for useful gadgets, smart home upgrades and everyday tech worth grabbing while the deals last.
Use a third-party app for deep duplicate scanning
Third-party apps can be a great option for more advanced duplicate detection, especially when files are stored outside the Photos app. For a safer cleanup option, we recommend Norton Utilities Ultimate, which includes tools to help clean junk files, free up storage and find duplicate or similar files so you can decide what to delete.
Once installed, you can scan your folders, review the detected duplicate files, select the ones you want to remove and delete them to free up space. We always encourage you to back up your system first before removing files, just in case you ever need to restore anything.
Feel free to use our CyberGuy discount link here if interested:
Norton Utilities Ultimate – Save $20
Bonus tip: Clear out old iCloud photo duplicates
If your Mac syncs with iCloud Photos, any duplicates removed from the Mac will also be deleted from iCloud. However, if you keep a lot of photos outside the Photos app, running TotalAV on your Mac storage can help clear space efficiently.
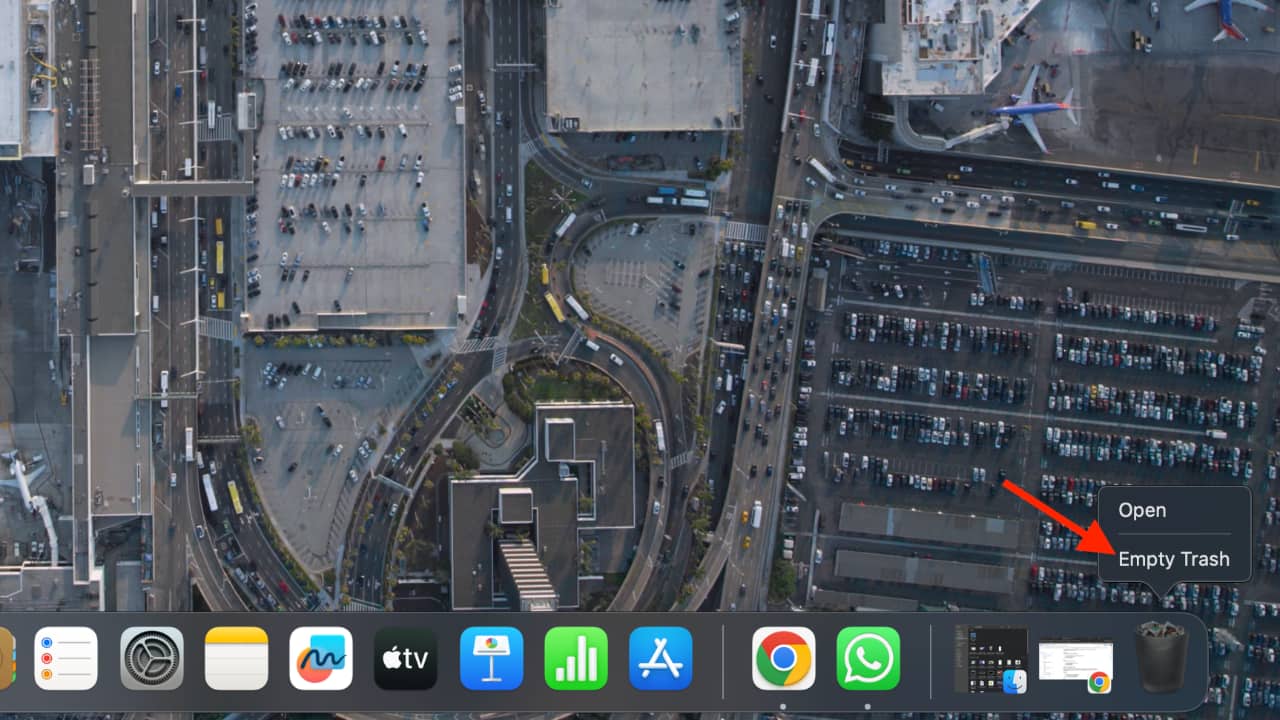
Empty Trash
When you delete something on your Mac, it remains in the Trash folder and continues to occupy storage space until you empty the Trash. The Trash does not automatically hold files for a specific number of days unless you have enabled the “Empty Trash Automatically” feature, which can be set to remove items after 30 days. If you need to free up space immediately, emptying the Trash is a good first step.
- Right-click the Trash icon in the dock.
- Select Empty Trash.
- Confirm the deletion by clicking Empty Trash.
LONG-DORMANT MAC MALWARE RETURNS WITH ADVANCED CAPABILITIES
Delete unnecessary apps
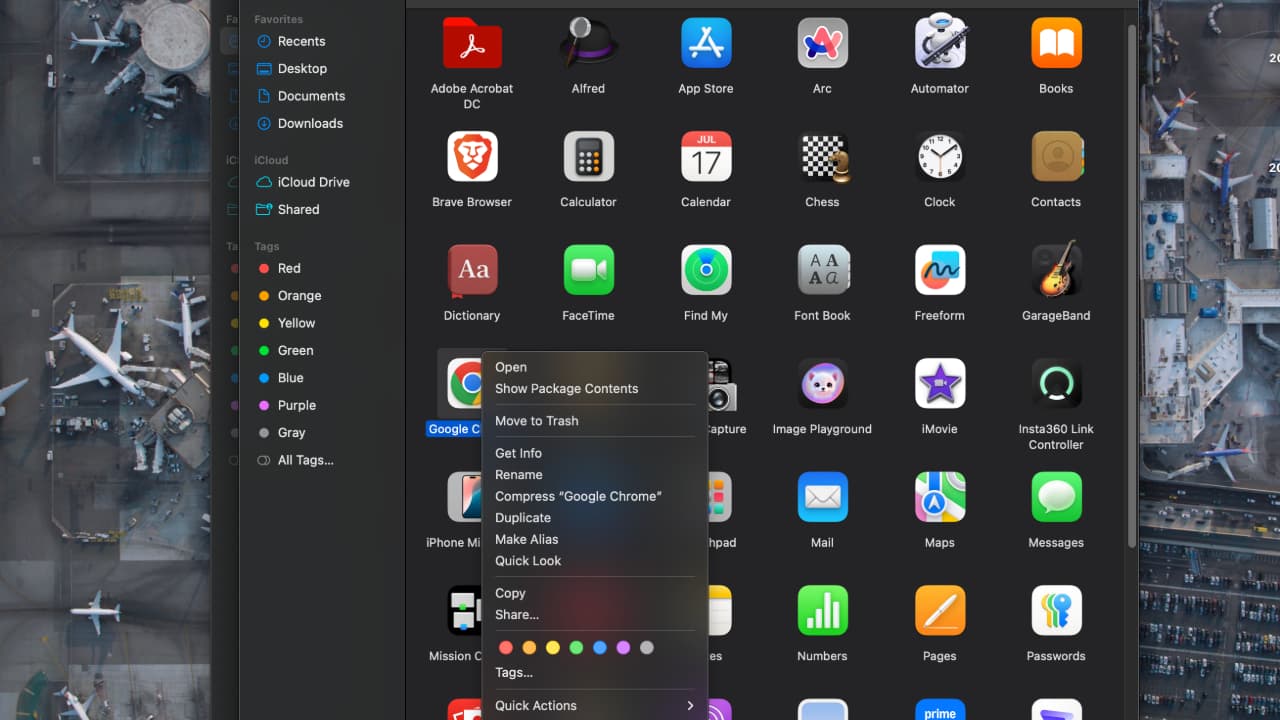
After clearing the Trash, the next step is to delete unnecessary apps. Unused applications take up valuable storage space and can slow down your system. Removing them will free up space and improve performance.
- Open Finder.
- Click Applications.
- Click and drag unused applications to the trash icon in the dock.
- Empty the Trash by right-clicking on the trash icon in the dock and selecting Empty Trash.
- Confirm the deletion by clicking Empty Trash.
10 USEFUL MAC KEYBOARD SHORTCUTS YOU NEED TO KNOW
Delete the files you don’t need
Take some time to go through your files and delete anything you no longer need. Old documents, large video files, duplicate photos, and outdated downloads can take up a surprising amount of space. If you are unsure about deleting certain files, move them to an external drive or cloud storage before permanently removing them.
- Click the Apple menu.
- Then select System Settings.
- Click General and select Storage.
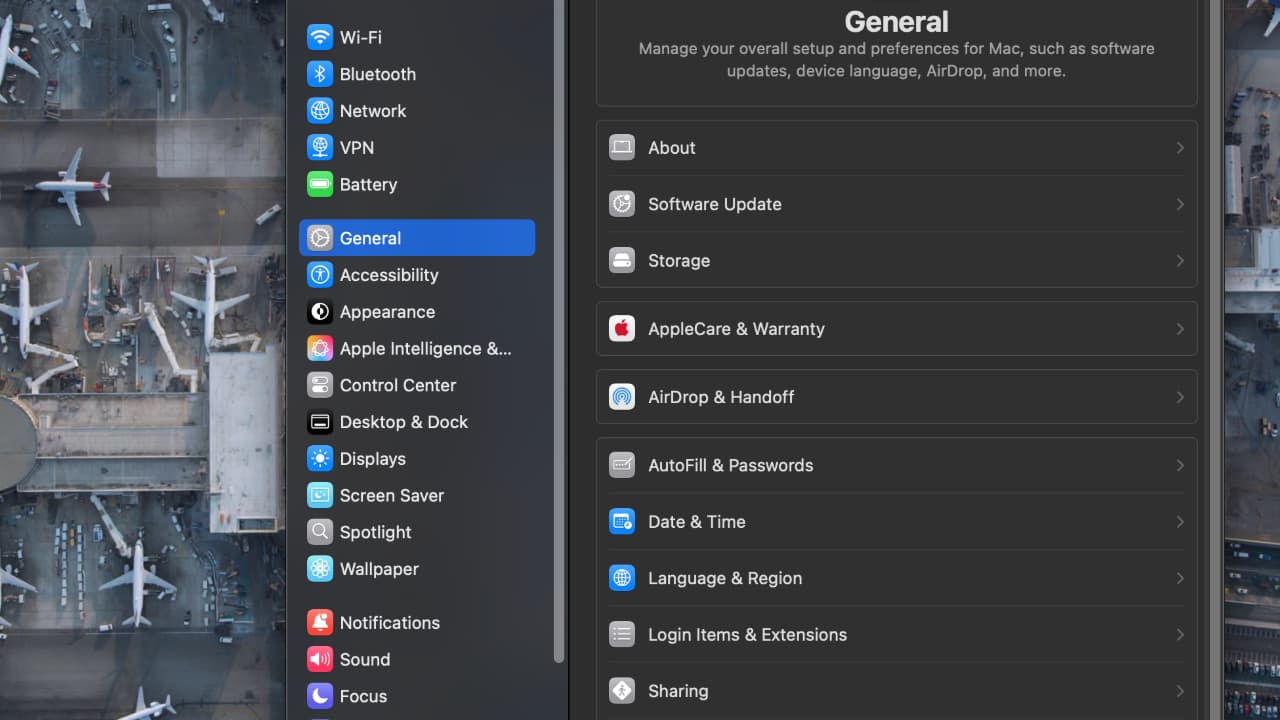
- Review categories like Documents, Applications, and Trash to find and delete large files.
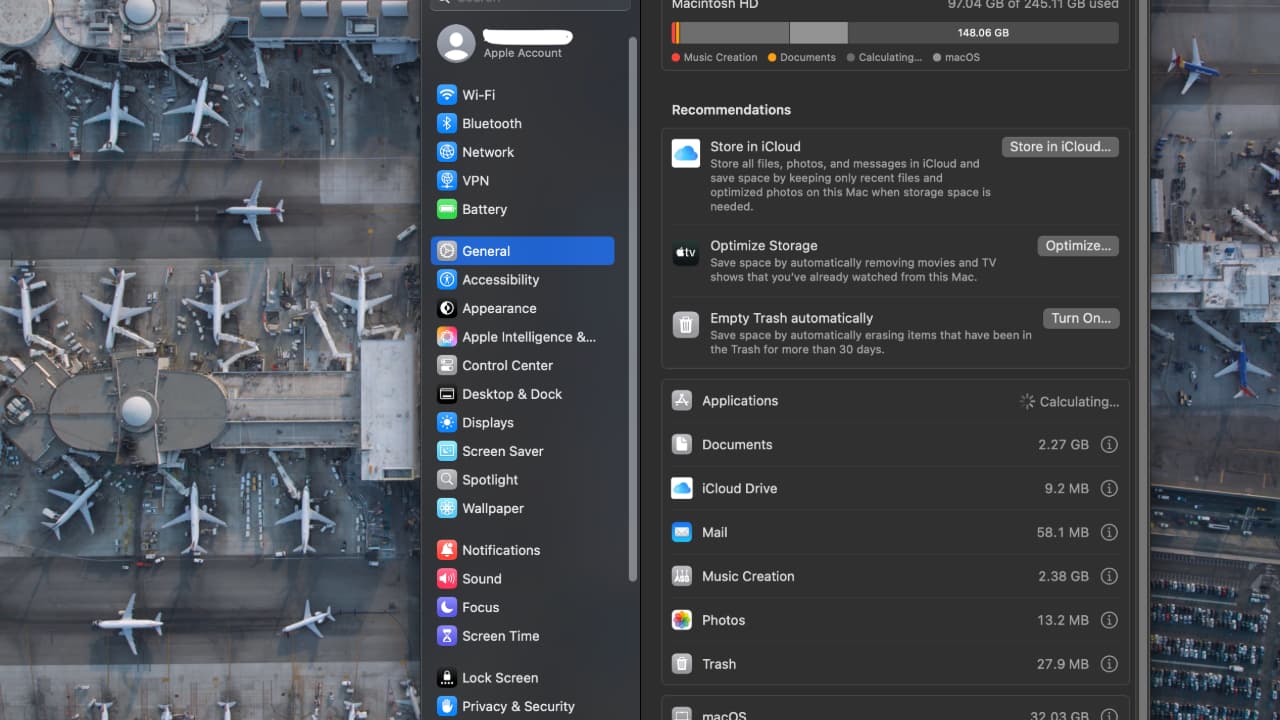
Always exercise caution when deleting files and ensure you have a backup before making significant changes to your data.
Transfer files to external storage
- Choose the right external drive: Opt for an external hard drive or solid-state drive (SSD) that suits your needs. SSDs offer faster speeds and better durability, while HDDs provide larger capacities at lower costs.
- Transfer files: Connect your external drive, copy your files to it, and verify that all files are successfully transferred.
- Delete original files: After verifying the transfer, delete the original files from your Mac to free up space. Use Finder to move files to Trash and then empty it.
Consider cloud storage
Use services like Google Drive, Dropbox, or Microsoft OneDrive to store large files and free up local storage. These services offer automatic syncing and backup features.
Kurt’s key takeaway
Managing duplicate photos on your Mac is easier than you think, especially with the built-in features in the Photos app. By clearing out duplicates and organizing your storage, you’ll not only free up space but also make it easier to find your favorite memories. Plus, combining this with other simple tips like emptying the Trash and transferring files to external storage can really help keep your Mac running smoothly.
What features or tools do you wish were available in the Photos app or other storage management software? Let us know in the comments below.
FOR MORE OF MY TECH TIPS & SECURITY ALERTS, SUBSCRIBE TO MY FREE CYBERGUY REPORT NEWSLETTER HERE
🎙 Now Streaming: My New Podcast: The CyberGuy Report
Kurt’s Top Deals
Deals move fast and inventory can be limited, so don’t wait too long.
| 🔥 Editor’s pick  Summer entertaining Ninja SLUSHi Machine (26% off) Frozen drinks and slushies at home in minutes. | |
| 💰 Top deal 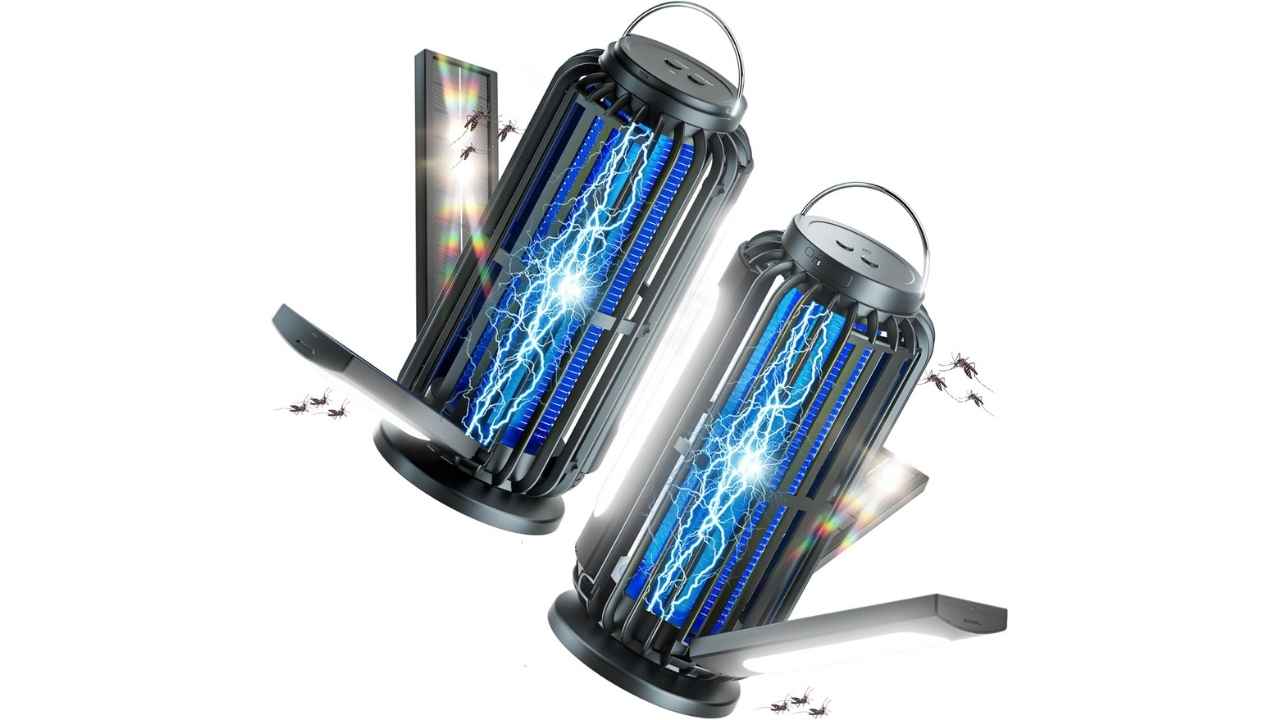 Outdoor essential TYPEC Solar Bug Zapper (36% off) Solar-powered bug zappers for patios and camping. |