



- Restarting your PC and installing updates can resolve many common slowdowns.
- Disabling unnecessary startup apps and freeing storage can improve everyday performance.
- Task Manager can reveal which apps are consuming the most memory, processing power and disk activity.
- RAM upgrades, an SSD or a Windows repair may help when basic fixes are not enough.
Has your PC been moving at a snail’s pace lately? Before you invest in a new computer or take your current one to a repair shop, there are several things you can try to get it running more smoothly.
A slow PC can have many causes. Too many startup apps, low storage space, outdated software, malware and aging hardware can all affect performance. Start with the simpler fixes below before moving on to hardware upgrades or reinstalling Windows.
These steps are written for PCs running the latest version of Windows 11. Microsoft ended standard support for Windows 10 on October 14, 2025. Windows 10 PCs will continue to work, but Microsoft recommends moving to Windows 11 on compatible devices to continue receiving standard security and software updates.
Here are 11 tips that may help bring your slow-moving PC back up to speed. If you have a Mac, you’ll want to check out our 8 tips to speed up your Mac’s performance.
The first steps
Start with these basic fixes. They do not require you to open your computer or make major changes to Windows.
Tip #1: Restart your PC
Before changing any settings, give your PC a proper restart. Restarting closes open applications, clears temporary system activity and gives Windows a fresh start.
Here is how to restart your Windows 11 PC:
- Save any open documents and close your applications.
- Click the Start button on the taskbar.
- Click the Power button.
- Select Restart.
- Wait for Windows to restart, then sign back in.
Do not select Shut down and immediately turn the PC back on as a substitute. Depending on your Windows power settings, Restart may provide a more complete refresh.
Tip #2: Install Windows and driver updates
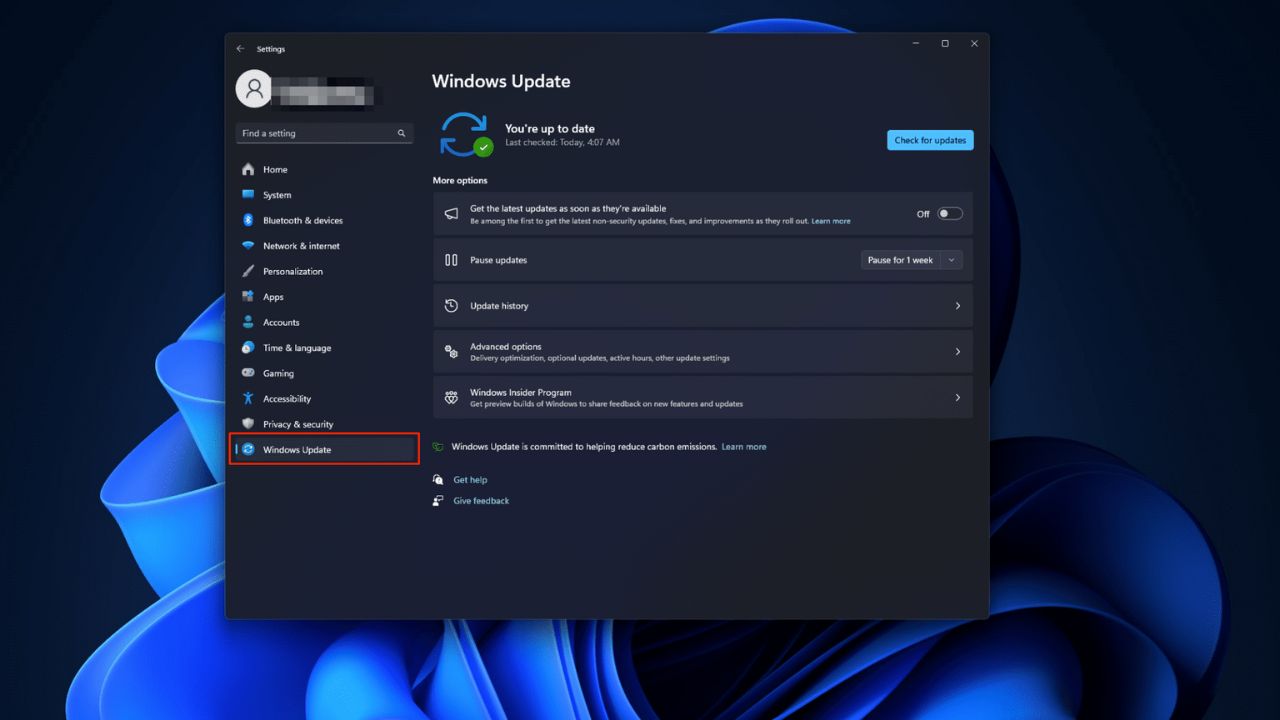
Windows updates include security fixes, reliability improvements and corrections for software problems that could affect performance. Windows 11 installs regular updates automatically, but you can check manually to make sure nothing is waiting.
Here is how:
- Click Start.
- Click Settings.
- Select Windows Update.
- Click Check for updates.
- Install any updates offered for your PC.
- Restart the computer if Windows asks you to do so.
You can also check for optional driver updates:
- Go to Settings > Windows Update.
- Click Advanced options.
- Select Optional updates.
- Open Driver updates, if that option appears.
- Review and install relevant driver updates offered for your hardware.
Windows automatically installs recommended drivers, while certain optional driver updates require you to select them manually.
You may also see a switch labeled Get the latest updates as soon as they’re available. Turning it on can give you certain nonsecurity improvements and features earlier. It does not control whether you receive regular security updates, which Windows continues to deliver either way.
Watch the latest episode of The CyberGuy Report.

Missed this event? Sign up via the registration form and see our live recording.
See Kurt’s latest Amazon picks for useful gadgets, smart home upgrades and everyday tech worth grabbing while the deals last.
Tip #3: Check your startup applications
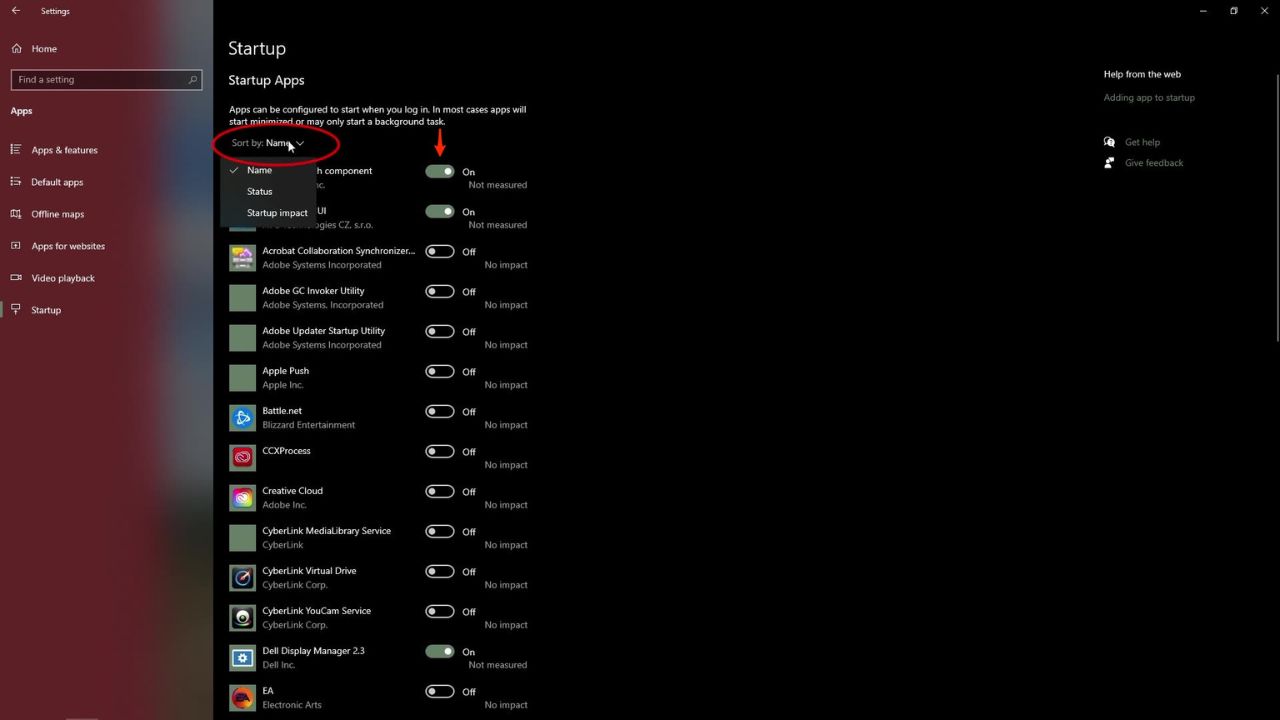
Some programs start automatically whenever you sign in to Windows. This can make startup take longer and leave unnecessary apps running in the background.
Task Manager shows which programs launch automatically and how much they may affect startup.
Here is how to review them:
- Press Ctrl + Shift + Esc to open Task Manager.
- Select Startup apps in the left toolbar.
- Review the Status and Startup impact columns.
- Select an app you do not need to launch automatically.
- Click Disable.
- Repeat this for other unnecessary startup apps.
Disabling an app here does not uninstall it. You can still open it normally whenever you need it. Be careful not to disable security software, hardware utilities or programs you do not recognize until you confirm what they do. Microsoft says Task Manager can help you identify and disable apps that have a high impact on startup.
Tip #4: Free up storage and optimize your drive
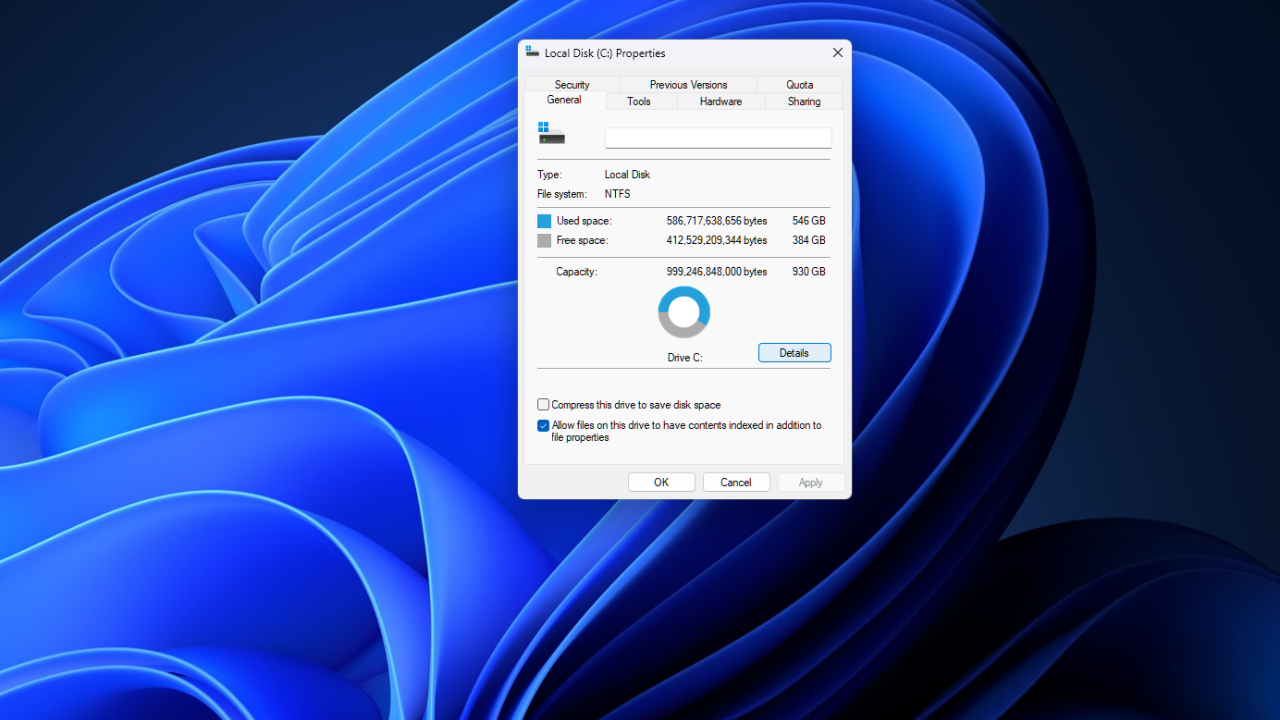
A PC can slow down when its main drive is nearly full. Windows includes tools that can identify temporary files, unused applications and other items taking up space.
Here is how to check your storage:
- Click Start.
- Click Settings.
- Select System.
- Click Storage.
- Select Cleanup recommendations or Temporary files.
- Review each category carefully.
- Select the items you no longer need.
- Click Clean up or Remove files.
Pay close attention before selecting your Downloads folder, Recycle Bin or previous Windows installation. These categories may contain files you want to keep. Deleting a previous Windows installation may also prevent you from returning to your earlier Windows version.
You can also turn on Storage Sense:
- Go to Settings > System > Storage.
- Select Storage Sense.
- Turn it on.
- Choose how often you want Windows to remove temporary files.
- Review the Recycle Bin and Downloads settings before enabling automatic deletion.
Storage Sense can automatically remove unnecessary temporary files and help keep storage space available.
Windows also includes a separate tool for optimizing storage drives:
- Click the Search box on the taskbar.
- Type defrag.
- Open Defragment and Optimize Drives.
- Select your drive.
- Click Optimize.
Windows applies the appropriate type of optimization for the drive. It can defragment a traditional hard disk drive and perform a trim operation on a solid-state drive.
More ways to reduce slowdowns
If the first four steps do not make enough of a difference, take a closer look at the apps and processes using your PC’s resources.
Tip #5: Uninstall unused applications
Your PC may contain manufacturer-installed programs, old applications or software you no longer use. Removing unnecessary programs can free storage space and may reduce background activity.
Here is how:
- Click Start.
- Click Settings.
- Select Apps.
- Click Installed apps.
- Find an application you no longer need.
- Click the three-dot menu beside it.
- Select Uninstall.
- Follow the on-screen instructions.
Only remove programs you recognize. Some applications support your computer’s audio, graphics, touchpad, printer or other hardware.
Certain built-in apps cannot be removed through Settings. Other traditional desktop programs may need to be removed through Control Panel > Programs > Programs and Features.
Tip #6: Check which apps are using your PC’s resources
If your PC suddenly feels slow, Task Manager can show whether an application is using a large amount of processing power, memory or disk activity.
Here is how to check:
- Press Ctrl + Shift + Esc to open Task Manager.
- Select Processes.
- Click the CPU, Memory or Disk heading to sort the list.
- Look for apps using an unusually large share of your resources.
- Close applications you recognize and are not currently using.
- Select the Performance tab to view overall CPU, memory and disk use.
Do not end unfamiliar Windows processes, security services or hardware-related programs. Closing an essential process could cause an application to stop working or make Windows unstable.
Microsoft recommends using the Processes, Performance and Startup apps sections of Task Manager to identify programs that may be slowing a PC.
Windows also lets you limit background activity for certain supported apps:
- Go to Start > Settings > System > Power & battery.
- Select Battery usage.
- Find the app you want to manage.
- Click the three-dot menu.
- Select Manage background activity, if available.
- Under Let this app run in the background, select Never.
This setting does not appear for every application. Desktop programs may use their own background and startup controls.
Tip #7: Turn off unnecessary visual effects
Windows 11 uses animations, shadows and transparency effects to make the interface look smoother. On an older or lower-powered PC, reducing some of those effects may make Windows feel more responsive.
For a quick adjustment:
- Click Start.
- Type Adjust the appearance and performance of Windows.
- Open the matching result.
- Select the Visual Effects tab.
- Choose Adjust for best performance.
That setting turns off most visual effects. For more control, select Custom and choose which effects you want to keep.
You can also turn off individual effects through Settings:
- Go to Start > Settings > Accessibility.
- Select Visual effects.
- Turn off Animation effects.
- Turn off Transparency effects, if desired.
The improvement may be modest on a newer PC, but it can help a computer with limited memory or processing power.

Tip #8 – Let Norton Utilities Ultimate handle routine cleanup
If manually tracking down everything slowing your PC feels overwhelming, a trusted cleanup and optimization tool can make the process easier.
Norton Utilities Ultimate combines several maintenance tools in one place to help free up storage, reduce unnecessary background activity and keep your computer running more smoothly.
Norton Utilities Ultimate can help you:
- Find and remove obsolete system junk and leftover files
- Identify programs running unnecessarily in the background
- Uninstall unused applications and preview how removing them may affect your PC
- Schedule automatic cleaning and maintenance
- Clear temporary browser files, cookies and other browsing data
- Find duplicate, large and old files in supported cloud-storage accounts
- Recover certain accidentally deleted files before they are overwritten
This can be especially helpful if you do not want to work through every cleanup task manually. However, always review the program’s recommendations before deleting anything. Back up important documents and photos first, and do not allow any cleanup tool to automatically remove large numbers of personal files without checking them.
It is also important to understand that Norton Utilities Ultimate is not antivirus software. It focuses on cleanup, storage and performance. You will still need antivirus protection to help protect against malware, phishing websites and unsafe downloads.
Hardware and recovery options
The following steps involve hardware changes or major Windows repairs. Before continuing, back up your important files and consider getting professional help.
Tip #9: Upgrade your RAM
RAM gives your computer space to keep active programs and information readily available. When your PC runs low on memory, Windows may rely more heavily on the storage drive, which can make applications feel slower.
Before purchasing RAM, check whether memory is actually the problem:
- Press Ctrl + Shift + Esc to open Task Manager.
- Select Performance.
- Click Memory.
- Use your computer normally for a while.
- Check whether memory use remains close to its limit.
Eight gigabytes of RAM may still work for basic web browsing, email and lighter office tasks. However, 16 GB gives Windows more room for heavier multitasking, video calls, photo editing and running many browser tabs.
Adding RAM will not fix every slow computer. A weak processor, full drive, overheating problem or slow hard disk could still limit performance.
Before buying memory, check:
- Whether your computer allows RAM upgrades
- The maximum amount of memory it supports
- The correct RAM type and speed
- Whether it has an available memory slot
Many thin laptops and compact computers have memory soldered to the motherboard, which means it cannot be replaced. Check the manufacturer’s specifications or ask a qualified technician before purchasing anything.
Tip #10: Replace a hard disk drive with an SSD
If your computer still uses a traditional hard disk drive, replacing it with a solid-state drive can produce a noticeable improvement in startup time, application loading and file transfers.
An SSD has no moving mechanical parts and can access data faster than a traditional hard disk drive. Microsoft notes that SSDs generally provide faster data access, quieter operation and greater durability than HDDs.
The biggest improvement usually comes from replacing an older hard disk drive. If your computer already has an SSD, replacing it with another SSD may provide more storage or faster transfers, but the everyday speed difference may be less dramatic.
Before buying an SSD, confirm:
- Whether your PC supports a 2.5-inch SATA or M.2 drive
- Whether an M.2 slot requires SATA or NVMe storage
- The physical size your computer accepts
- The storage capacity you need
- Whether you plan to clone the old drive or reinstall Windows
Back up your important files before replacing a drive. If you are not comfortable opening the computer and transferring Windows, have a qualified repair technician handle the upgrade.
Tip #11: Repair or reinstall Windows
Reinstalling Windows should be one of your final options. Before erasing anything, Windows 11 offers a repair method that can reinstall the current operating system while preserving your files, applications and settings.
To try the repair reinstall:
- Click Start.
- Click Settings.
- Select System.
- Click Recovery.
- Find Fix problems using Windows Update.
- Click Reinstall now.
- Follow the on-screen instructions.
- Restart the PC when the process finishes.
This downloads and reinstalls the current version of Windows while preserving your apps, files and settings. The option may not appear on every PC, including certain managed work or school devices.\
If that does not solve the problem, you can reset the PC:
- Go to Start > Settings > System > Recovery.
- Next to Reset this PC, click Reset PC.
- Choose Keep my files or Remove everything.
- Choose Cloud download or Local reinstall.
- Carefully review the summary before continuing.
Keep my files preserves your personal files, but it removes installed applications and resets Windows settings. Remove everything removes your personal files, applications and settings.
A true clean installation using Windows installation media is more destructive and may remove everything on the drive. Before attempting one:
- Back up your personal files.
- Save your BitLocker recovery key.
- Make sure you can reinstall your applications.
- Confirm that you have any required software licenses.
- Download necessary hardware drivers.
- Keep the computer connected to power.
Microsoft’s installation-media options can preserve apps and files, preserve personal files only or remove everything, depending on the option you choose. Review each choice carefully before selecting Install.
If you are uncomfortable reinstalling an operating system, take your PC to a reputable repair professional.
Related Links:
- Fake Google Meet update lets hackers control your Windows PCs
- Fake ad blocker breaks PCs in new malware extension scam
- Top ways to optimize your PC and Mac devices
Kurt’s key takeaways
A slow PC does not automatically mean you need a new computer. Start with a restart, install available Windows updates and remove unnecessary startup apps. Then check your storage space and use Task Manager to see what is putting the most pressure on your system. Cleanup software such as Norton Utilities Ultimate can make routine maintenance easier, but you should still review every recommendation before deleting files or uninstalling programs. Before spending money on RAM or an SSD, confirm which part of your PC is holding it back and whether the hardware can be upgraded. If Windows itself appears damaged, try the repair reinstall before resetting the PC or performing a clean installation.
What has made the biggest difference when you have tried to speed up a slow PC? Let us know below in the comments.
FOR MORE OF MY TECH TIPS & SECURITY ALERTS, SUBSCRIBE TO MY FREE CYBERGUY REPORT NEWSLETTER HERE
Copyright 2026 CyberGuy.com. All rights reserved. CyberGuy.com articles and content may contain affiliate links that earn a commission when purchases are made.
🎙 Now Streaming: My New Podcast: The CyberGuy Report
Kurt’s Top Deals
Deals move fast and inventory can be limited, so don’t wait too long.
| 🔥 Editor’s pick  Summer entertaining Ninja SLUSHi Machine (26% off) Frozen drinks and slushies at home in minutes. | |
| 💰 Top deal 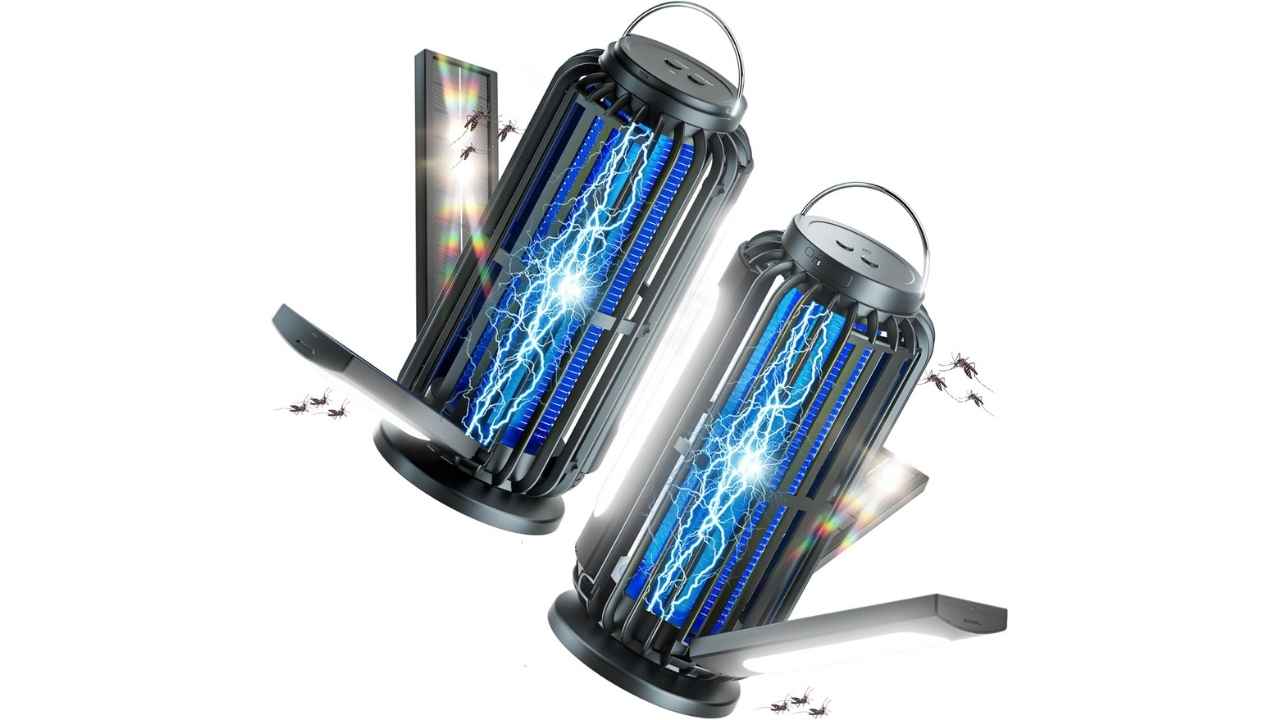 Outdoor essential TYPEC Solar Bug Zapper (36% off) Solar-powered bug zappers for patios and camping. |


