Is it ‘big brother’ or your phone that you should worry about?
The constant assault on privacy seems unavoidable in this digital age. When you think of being spied on, it’s easy to think of the devices shared in How to find out who’s spying on you. Yet as you educate yourself against some obvious culprits invading your privacy, it might be hard to imagine that one of the most invasive entities is a product you use daily: your smartphone, computer, or tablet.
Part of the appeal of such an intelligent device is that the phone and the apps it hosts collect information on your preferences and behaviors to anticipate your needs and make your life easier. However, a slew of apps does not need access to certain functions of your device or data to perform as needed.
While manufacturers have made strides to help users identify when their cameras and microphones are being used, it is up to the user to take the extra step to safeguard themselves. As explored in How to tell what green or orange dots mean, iPhones have indicators at the top right corner that notifies a user with a green dot when the camera is being used and an orange dot when the microphone is being used.
As apps continue to push for more access than is necessary for their basic function, below are ways to control apps more proactively on iPhones, iPads, Macs, and Androids. It will help you be more aware of what your apps are doing actively or in the background, and it will give you your power back to determine who’s watching, listening, and studying you!

Table of Contents:
How to limit unwanted access
While there is a convenience in seeing the green or orange dot indicators, you don’t have to wait until your app is open to find out. After all, some apps access your devices’ microphone, camera, or data even while unopened.
1. Delete unwanted or unused apps
Some apps use your device’s camera and microphone and collect your data even while it is not in use. Getting rid of unused apps frees up storage space on your phone and declutters your lock screen. It can also eliminate one more potential app that might be collecting information from you unknowingly.
On an iPhone & iPad:
- Hard press the app icon of the app you want to delete
- Select Remove App
- You’ll be prompted to confirm your decision in the next window by tapping Delete App
- Then again by tapping Delete
On a Mac:
- Click and hold the icon of the app you want to delete
- Drag into the trash icon
- Empty the trash
On a PC:
- Select Start
- Click All apps
- Search for the app you want to uninstall
- Press and hold the app or right-click on it and select Uninstall
- Review & change permission settings
On an Android:
- Go to the Google Play Store app
- At the top right, tap the Profile icon
- Select ‘Manage apps & devices, click Manage
- Select name of the app you want to delete
- Select Uninstall
Android settings may vary based on the manufacturer’s settings.
While it may seem like an extra effort to review and change your apps’ permission settings, it’ll give you more peace of mind knowing which apps have access to specific device functions and data. Most devices now have a dedicated part of their settings to view which apps are using the different functions of your phone and what data it has access to.
Changing camera settings:
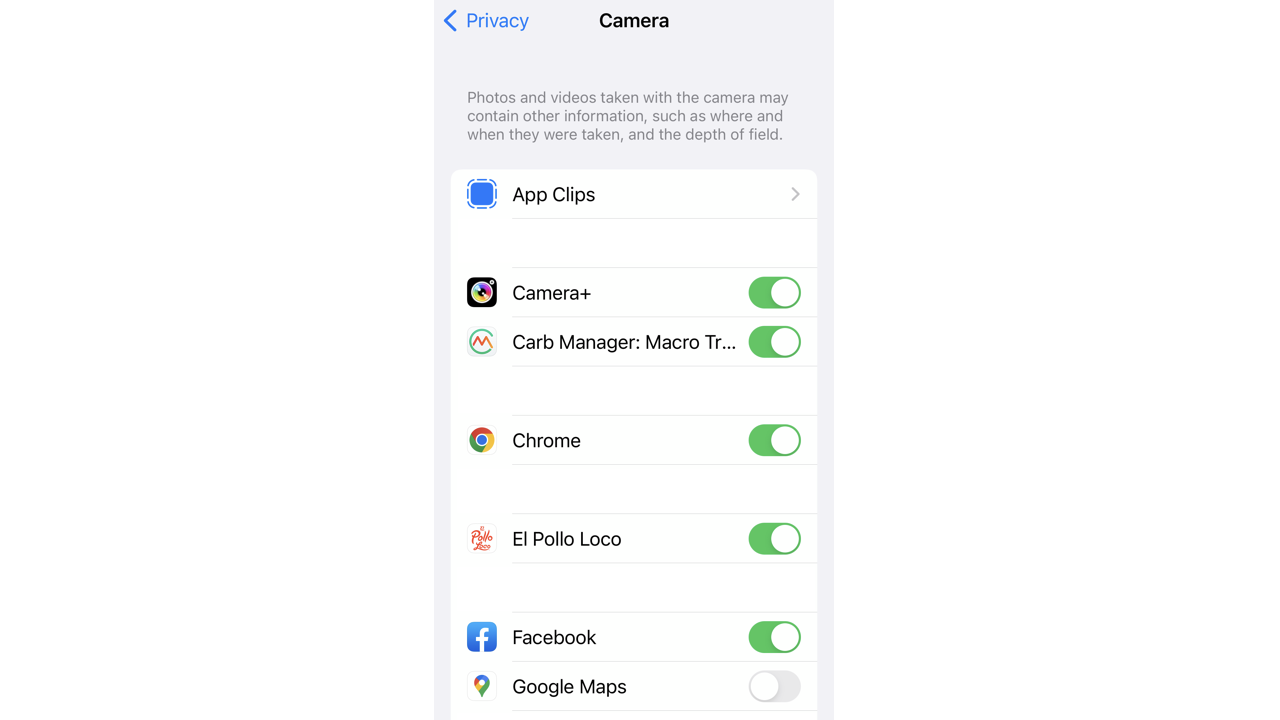
It may seem simple to just give access to your camera to certain apps. This way, you can easily use the camera function whenever you pull up the app to use. There, however, are apps that do not need access to your camera to function. Does your navigation app need access to your camera even when it is not in use? Take back control of your camera by using the steps below to find out which apps have access to your camera and turn it on or off.
On an iPhone & iPad:
- Go to Settings
- Scroll down and select Privacy or Privacy & Security
- Select Camera
- You can see which apps have access to your camera. Of course, you can leave the apps where it makes sense to have access to your camera toggle on. For apps that do not, you can toggle access off (it will be greyed out)

On a Mac:
- Select System Preferences in your dock
- Click Security & Privacy or it might be listed as Privacy & Security
- Select Privacy tab
- Click Camera to see which programs and apps have access to these functions
- Check or uncheck apps or programs you wish to give or deny access to the camera
On a PC:
- Select Start
- Go to Settings
- Click Privacy & security
- Click Camera
- Make sure Camera access is turned on
- Turn on Let apps access your camera. This setting allows you to choose if any of your apps can access the camera
- Once you’ve allowed your apps to access the camera, you can change the setting for each app
On an Android:
- Open Settings
- Select Apps
- Select the app you want to change (If you can’t find it, select ‘See all apps’)
- Select Permissions to view if you allowed or denied any permissions for the app
- To change a permission setting, select it, then choose Allow only while using the app, Ask everytime or Don’t allow
Android settings may vary based on the manufacturer’s settings.
Changing Microphone settings:
On an iPhone & iPad:
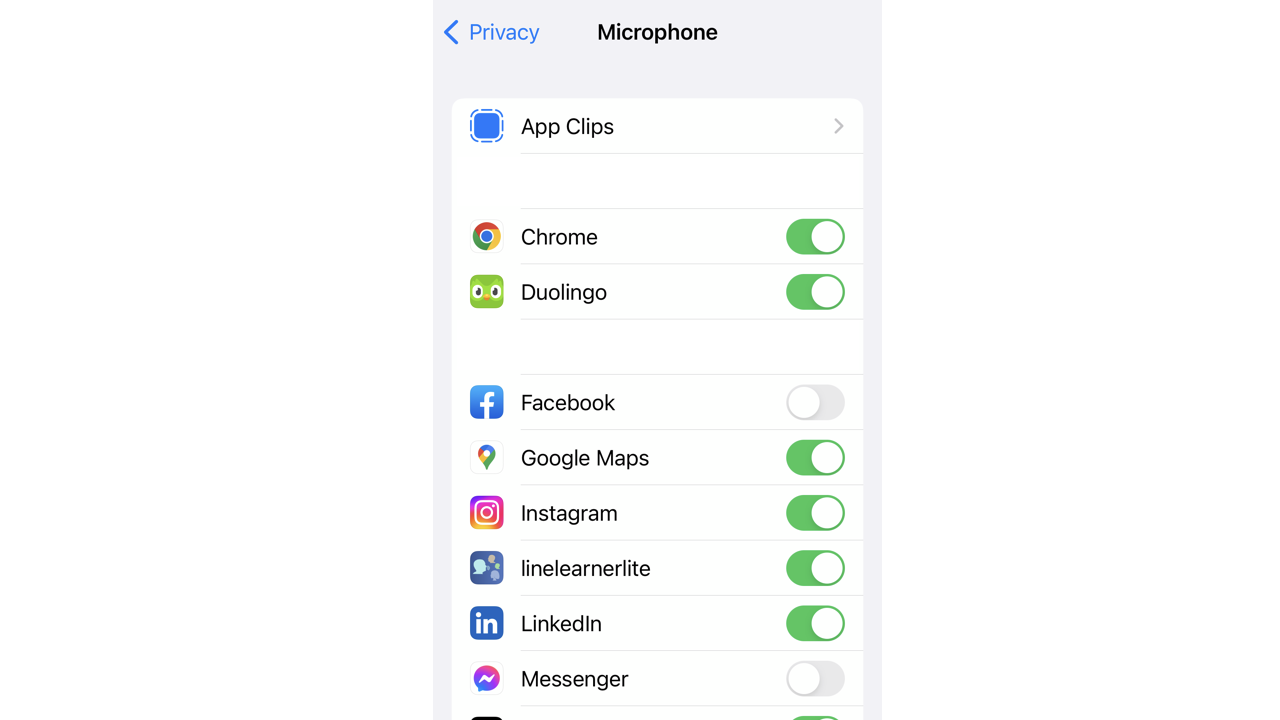
- Go to Settings
- Scroll down and select Privacy or Privacy & Security
- Select Microphone
- You can see which apps have access to your microphone. Of course, you can leave the apps where it makes sense to have access to your microphone toggle on. For apps that do not, you can toggle access off (it will be greyed out)

On a Mac:
- Select System Preferences in your dock
- Click Security & Privacy or it might be listed as Privacy & Security
- Select Privacy tab
- Click Microphone to see which programs and apps have access to these functions
- Check or uncheck apps or programs you wish to give or deny access to the microphone
On a PC:
- Select Start
- Go to Settings
- Select Privacy & security
- Click Microphone
- In Allow access to the microphone on this device, select Change and make sure Microphone access for this device is turned on.
- In Microphone settings, go to Allow apps to access your microphone and make sure it’s turned on.
- Once you’ve allowed microphone access to your apps, you can change the settings for each app. In Microphone settings, go to Choose which Microsoft apps can access your microphone, and turn on apps you want to use with it.
- For desktop apps, make sure that Allow desktop apps to access your microphone is turned on.
On an Android:
- Open Settings
- Select Apps
- Select the app you want to change (If you can’t find it, select ‘See all apps’)
- Select Permissions to view if you allowed or denied any permissions for the app
- To change a permission setting, select it, then choose Allow only while using the app, Ask everytime or Don’t allow
Android settings may vary based on the manufacturer’s settings.
Changing location service:
A quick check of who and what is on the receiving end of your exact location will surprise you. We all tend to simply click yes or okay when downloading an app. Over time, the list of location stalking apps starts to grow longer than is safe for your privacy and protection.
On an iPhone & iPad:
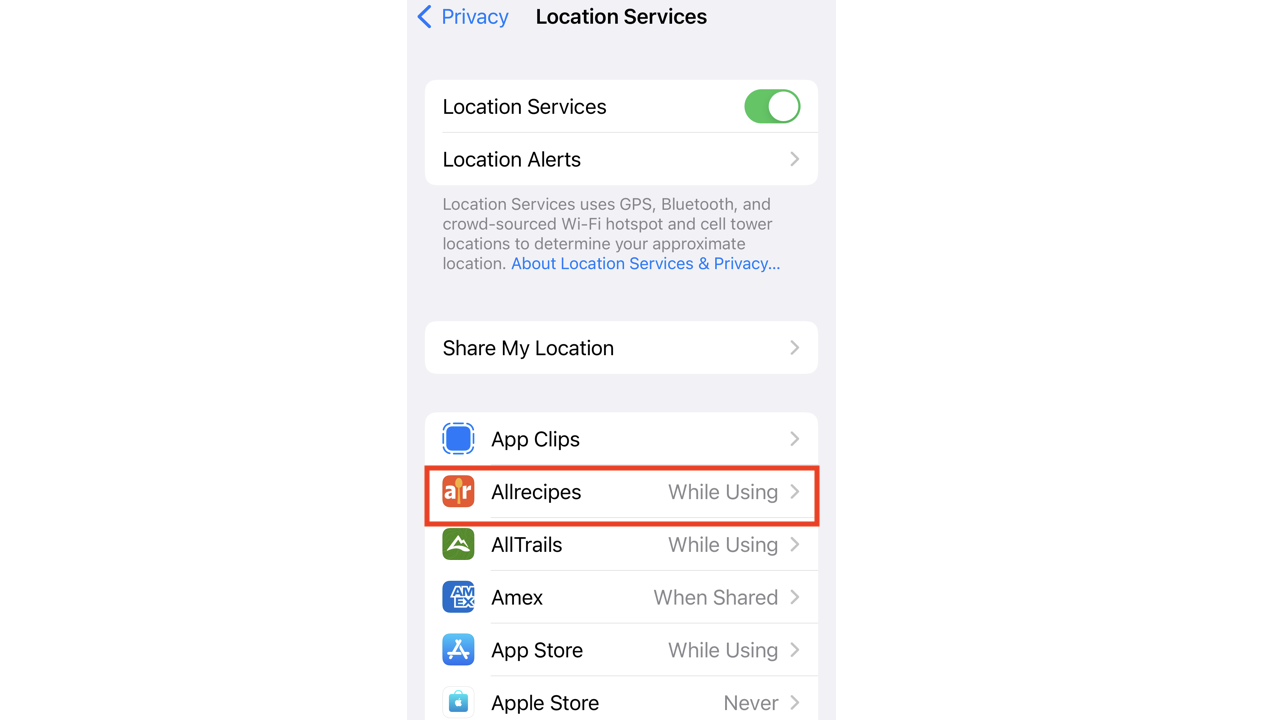
- Go to Settings
- Scroll down and select Privacy or Privacy & Security
- Select Location Services
- In Location Services, you can see which apps have access to your location and when
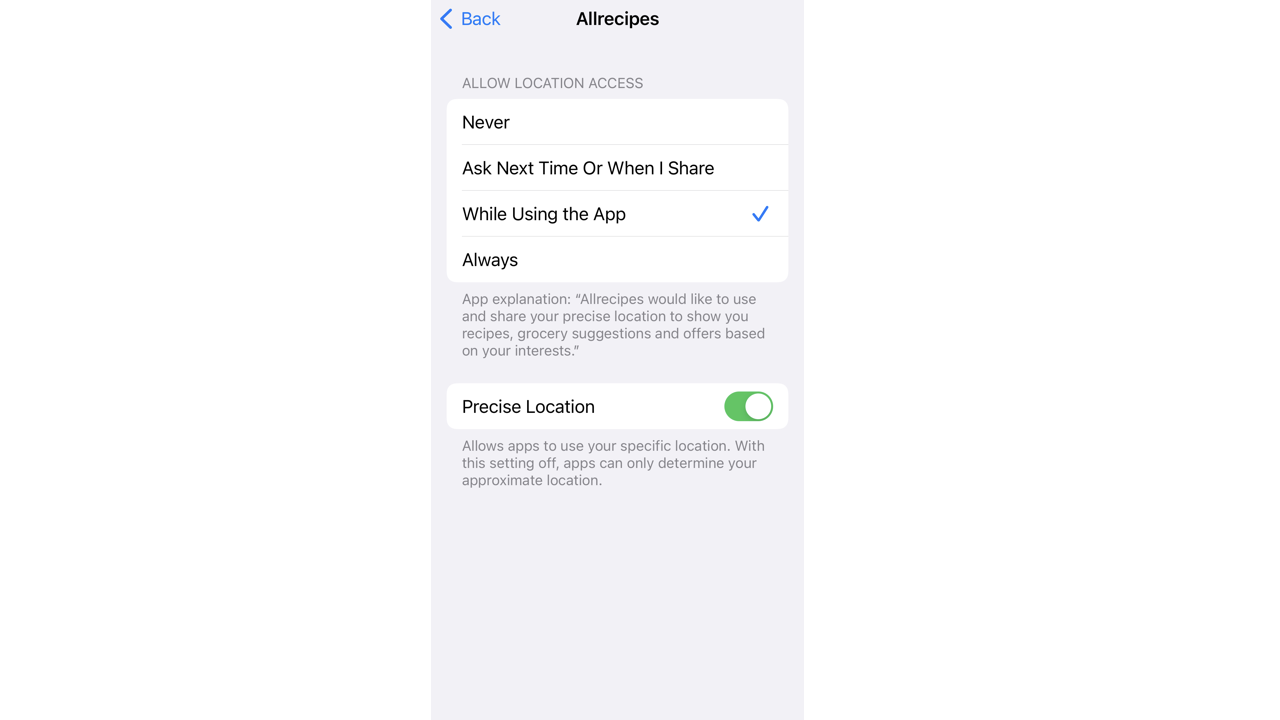
- Select the app you want to change the location services setting (For example: I selected ‘Allrecipes’)

- You’ll see the following options:
- Never
- Ask Next Time
- While Using the App
- Always
- In this specific example, I don’t feel that a cooking recipe app needs my location at all times. It is helpful, however, to have accurate location service while using the app as it does aggregate information about where and for how much the ingredients in a recipe are being sold for near me.
- Still nervous about giving your exact location? Toggle off Precise Location to provide an approximate location instead.

On a Mac:
- Select System Preferences in your dock
- Click Security & Privacy or it might be listed as Privacy & Security
- Select Privacy tab
- Select Location Services and check off the apps or programs you want to give access to your location information
On a PC:
- Go to Start
- Click Settings
- Click Privacy & security
- Go to Location.
- To control location for just your user account, switch the Let apps access your location setting On. Then choose which apps you want to allow access to your location
On an Android:
- Swipe down from the top of the screen twice
- Tap and hold Location
- Select App permissions
- Under categories such as Allowed all the time and Allowed only while in use, you’ll find which apps that can use your phone’s location and when
- Select the app if you want to change its permission
- Under Location Permission, select one of the following:
- Allow all the time
- Allow only while using the app
- Don’t allow
Putting the control back in your hands
It’s easy to shrug off the importance of guarding your privacy on your devices. Yet, so much information about you is getting collected about you and your loved ones beyond the necessary scope to operate accurately. It is essential to take control of your privacy by making sure that you:
- Know which apps are using certain functions of your phone and what data is being collected
- Limit unnecessary access.
While it is convenient to call out to Siri when your hands are full, it is an entirely different situation knowing that your rideshare app is utilizing access to your microphone and camera when you’re not even using it.
Sure, you may have nothing to ‘hide’; however, do you really want bits of text messages and contact information being collected about you and sold to the highest bidder?
Other preventative measures to take include:
- Only download apps from official sources such as the Apple App Store or Google Play Store
- Make sure the apps you are downloading come from well-reviewed and reputable developers
- Installing antivirus software such as my #1 pick TotalAV. Antivirus software will protect you from accidentally clicking malicious links and will remove any malware from your devices. Get my review of Best Antivirus Protection here.
Let us know how you set your controls on your device to help protect your privacy. We’d love to hear from you.


1 comment
Best advice to date. Not a techie by any means, but your info step by step should allow me to try this. If all else fails, smart grandsons to my rescue. Thanks