

Trying to take a screenshot on your desktop and mobile devices is now easier than ever. These days you can take a shot of the entire screen, part of the screen, the whole (scrolling) page …and you can take a photo and even a video recording of it. Let me break it down.
Table of Contents:
How to take a screenshot on a Mac
Built into your Mac, you can use the following shortcuts:
- Command + Shift + 5: Capture the entire screen, part of the screen or one of your windows as a photo or even a video. You can also set a timer for 5 or 10 seconds.
- Command + Shift + 3: Capture entire screen
- Command + Shift + 4: Cursor will be turned into a crosshair, and you can screengrab a portion of the screen
How to take a screenshot on a PC
Print Screen
In the upper-right side of your keyboard, hit the “print screen” button. An image of your entire screen is now in your clipboard. If you click control+V (paste), you can paste the image into MS Word or any image program. In many newer models, pressing Print Screen now opens Snipping Tool by default.
How to take a screenshot on an iPhone
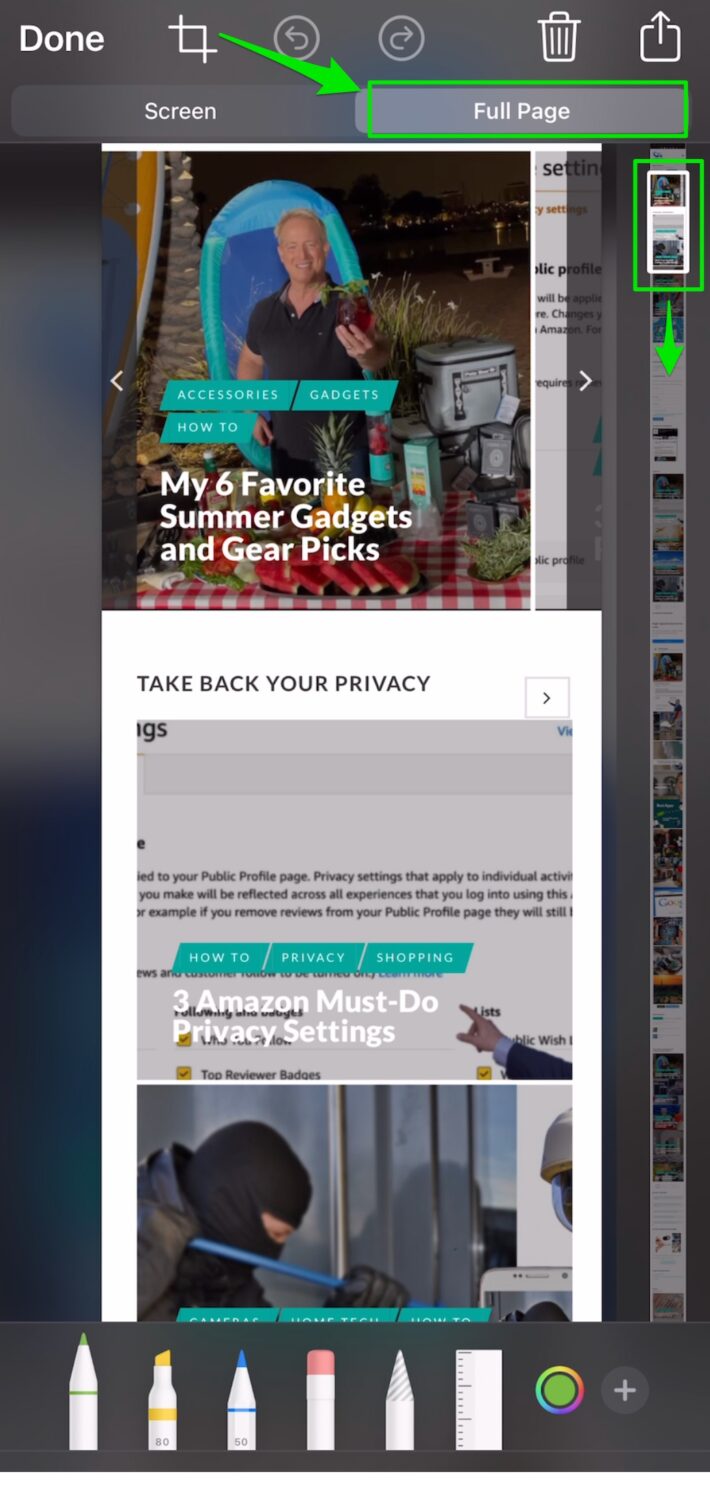
At the same time, hold down the side button to the right of the screen and then then the volume up button. The screenshot will save to your camera roll of photos. After you take the screenshot, you can opt to select the “Screen” or the “Full Page” page in the screen.
Note you can also use the tools (pen, pencil, highlighter) on the bottom of the screen to mark up the image. After you’re done marking up the image, click “done”. If you’re saving just the “screen”, you can save the new image to your photos or your files. If you’re saving the “full page”, the image will be saved as a PDF in your files folder.
Where is the files folder on an iPhone?
Go to your home screen and tap the bottom of it and pull down to reveal the search bar. Type in “Files”. Once you click the folder, you will see the images and/or pdfs you saved as referenced above.
Bonus Tip: The Double Tap Screenshot
Did you know you can update your Accessibility settings so that if you double-tap the back of your iPhone, it will take a screenshot? This applies only to the following iPhone models:
- iPhone X.
- iPhone XR
- iPhone Xs and Xs Max
- iPhone 11, iPhone 11 Pro, and 11 Pro Max
- iPhone 12 and later
Here’s how you do it:
- Click “Settings”
- Scroll down to “Accessibility”
- Scroll down to “Touch”
- Scroll down to “Back Tap”
- Click “Double Tap” and set “Screenshot”. You can also set it for the “Triple Tap” option too. Note you can associate other actions with these taps like (“Volume Up”, “Volume Down”, “Siri”, “Mute” and more)
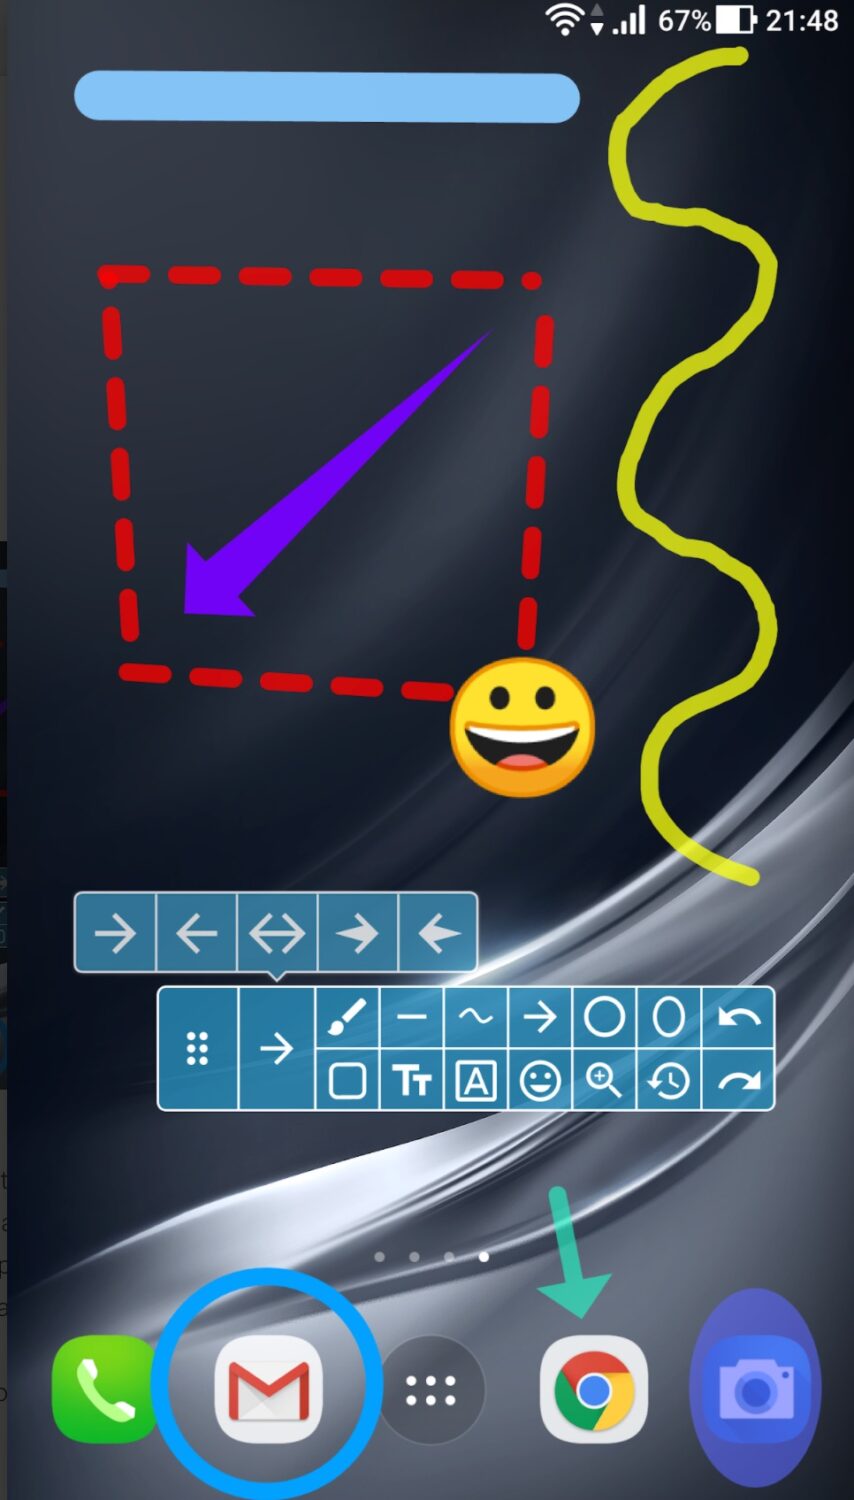
How to take a screenshot on an Android device
Most devices should work by holding down the volume down button and power buttons. If you hold the power and home buttons that may work as well. Screenshots will be found in your photo gallery.
Free App: Screenshot Easy
This app allows you to take photo or video screenshots. You can resize, annotate and add filters to your screenshots. Plus you can capture the entire web page. Download it here.
How to take a screengrab in a web browser
Another one of my favorite tools especially for capturing long webpages on desktops or laptops is the Awesome Screen Recorder. This is a Chrome or Firefox extension that you can download. There are various plans, but the free plan should be sufficient which includes:
- viewing and sharing the latest 100 cloud screenshots with their basic annotation tools.
- Watch & share the latest 20 cloud videos
- 5 minutes per recording
- Resolution up to 720p
- Recover items from Trash within 3 days
**Record**
- Record your Desktop, current Tab or Camera only
- Include your voice in recording with Microphone option on
- Include your face in your video by embedding your webcam
- Choose video dimensions from 720p, 1080p or 4K**Save & Share Recording**- Instantly get a shareable link of a video after finishing recording
- Easily share a recording video to Jira, Slack, Trello, Asana, GitHub
- Download uploaded videos in WebM or MP4 format
- Save recordings to local disk. Prefer to screenshot web pages as images? No problem, you can set the Capture tab as the primary tab.
**Screen Capture**
- Capture a screenshot of the page you visit, full page, selected area or visible part
- Capture a screenshot of your entire screen or a specific application window
- Capture visible part, entire screen or app window after delay
**Annotate Screenshot**
- Resize or crop a screenshot to the size you need
- Annotate your screenshot with rectangle, circles, arrows, lines, etc.
- Add text to your screenshot with or without background color, change text font and font size
- Blur sensitive information on your screenshot
- Highlight important part on your screenshot
- Select a local image or paste a copied image from your clipboard to annotate
**Save & Share Screenshot**
- Save screenshot as image in PNG or JPG format, or download screenshot as PDF
- One click to save screenshot to your Awesome Screenshot account and get a shareable link
- Send a screenshot to a destination in Jira, Slack, Trello, Asana, GitHub
- Copy a screenshot directly when capturing selected area for quick pasting
Got another tool you like I didn’t mention? Share your favorite screenshot tool in the comments below!
Kurt’s Key Takeaways
Whether you’re on a Mac, PC, iPhone, or Android, taking screenshots has never been easier – or more powerful. From capturing full screens and scrolling pages to marking up images or recording videos, today’s tools give you flexibility and control over what you save and share. Bonus features like iPhone’s Back Tap or apps like Screenshot Easy make the process even smoother. The takeaway? Mastering screenshots isn’t just convenient – it’s a simple way to stay organized, share information quickly, and capture the moments that matter.
Copyright 2026 CyberGuy.com. All rights reserved. CyberGuy.com articles and content may contain affiliate links that earn a commission when purchases are made.
🎙 Now Streaming: My New Podcast: The CyberGuy Report
Kurt’s Top Deals
Deals move fast and inventory can be limited, so don’t wait too long.
| 🔥 Editor’s pick  Summer entertaining Ninja SLUSHi Machine (26% off) Frozen drinks and slushies at home in minutes. | |
| 💰 Top deal  Outdoor essential TYPEC Solar Bug Zapper (36% off) Solar-powered bug zappers for patios and camping. |


1 comment
Great ideas but I use Win 10 Snip Tool all the time and get just the parts I want. I have it clipped to the Task Bar ready to use.