Are you tired of scrolling through endless spam and old text messages on your iPhone? You’re not alone! Many of us struggle with cluttered inboxes filled with unwanted messages. Well, I’ve got some great news for you. I’m here to show you how to quickly clean up your iPhone’s Messages app and keep those pesky spam texts at bay. (Android users, follow these tips)
GET SECURITY ALERTS, EXPERT TIPS – SIGN UP FOR KURT’S NEWSLETTER – THE CYBERGUY REPORT HERE
How to bulk delete unwanted conversations
Let’s start with bulk deleting those unwanted conversations:
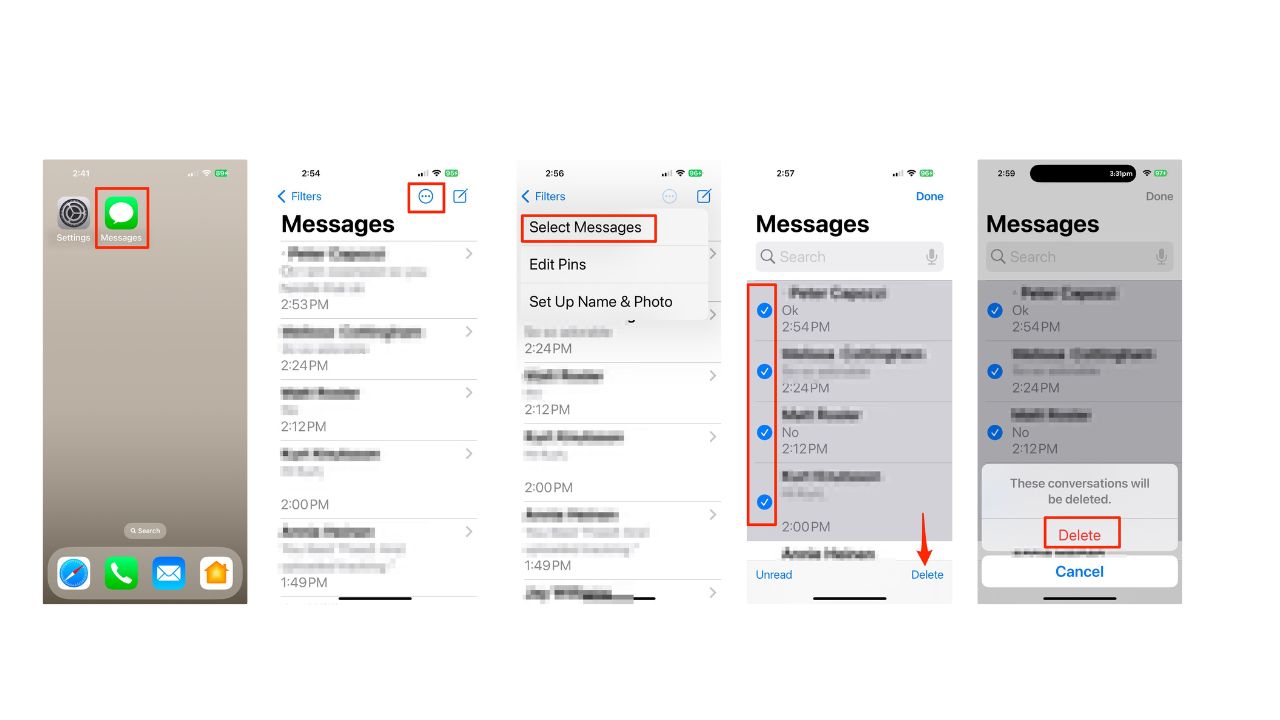
- Open up your Messages app on your iPhone.
- Look for that Edit button in the top-right corner and give it a tap.
- Click Select Messages.
- Now, you can select multiple conversations at once by clicking the round circle next to all those spam threads or old chats you no longer want.
- Once you’ve made your selections, hit that Delete button in the bottom-right corner.
- You’ll be asked to confirm your decision by clicking Delete again. Boom, all those spam threads and old chats are gone in seconds.
OUTSMART SPAMMERS TO FINALLY END UNSOLICITED EMAILS
How to filter out spam messages on iPhone
But what if you could keep your Messages app free of spam or unwanted messages? Here’s a nifty trick:
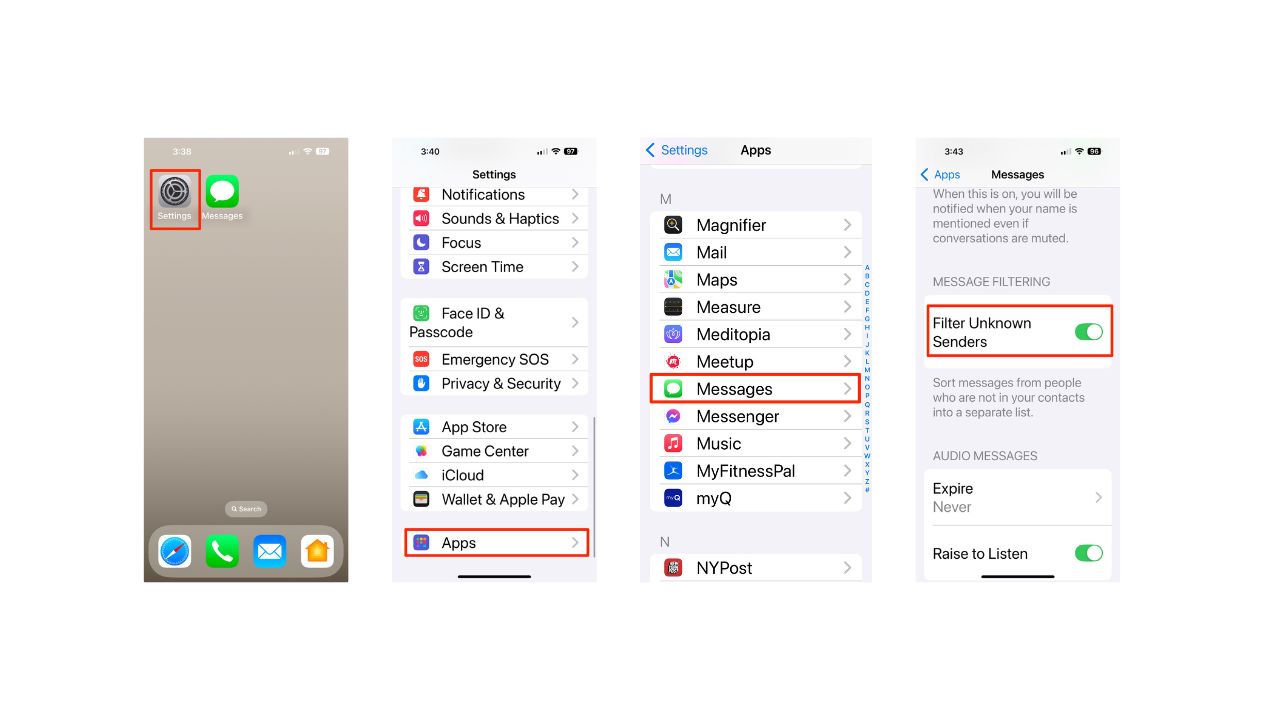
- Head over to your iPhone’s Settings and give it a tap.
- Tap Apps.
- Then click Messages.
- Scroll down to Message Filtering and toggle on Filter Unknown Senders.

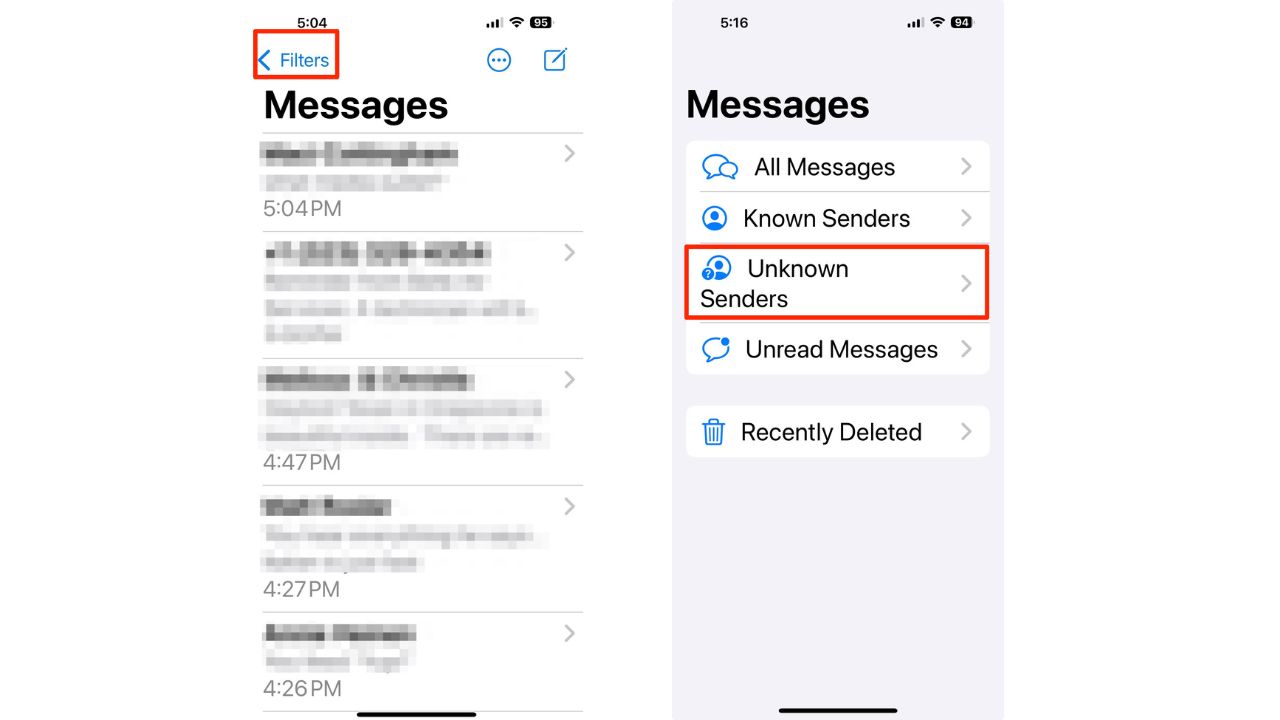
This feature automatically sorts messages from people who aren’t in your contacts into a separate list, making it easier to manage potential spam or unwanted messages. In the Messages App, tap Filters in the upper right corner, and you will see Unknown Senders.

HOW TO BLOCK A PHONE NUMBER OR TEXT ON YOUR SMARTPHONE
How to set up automatic deletion of older messages
Now, for those who prefer to keep their message history down to a minimum, you can also set up automatic deletion of older messages. This feature is helpful if you’re running low on device storage and sharing a lot of long videos, which can really fill up your storage fast. Plus, some of you might want to do this not just to save space but also to keep your conversations private.
Here’s how to set it up:
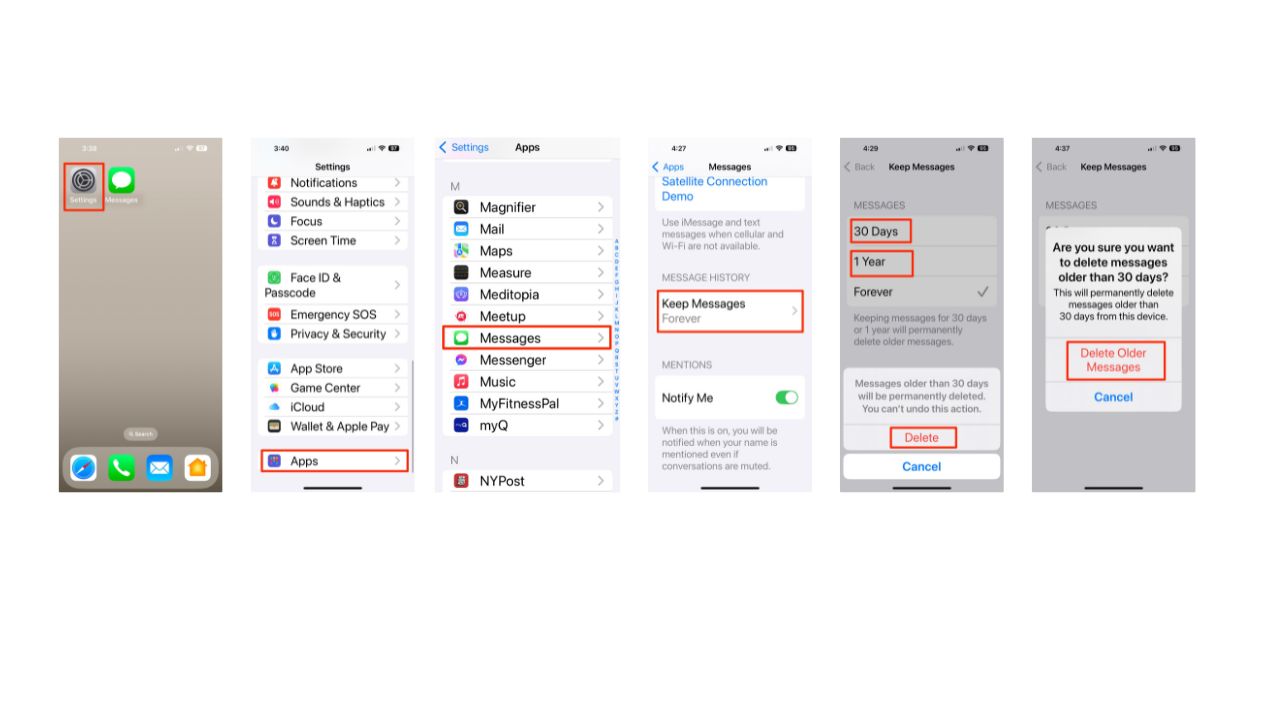
- Head over to your iPhone’s Settings and give it a tap.
- Tap Apps.
- Scroll down and click Messages.
- Scroll down to Message History and tap on Keep Messages.
- You can choose to automatically delete messages after 30 days or 1 year.
- Just click on either 30 days or 1 year and tap Delete.
- Then, confirm your decision by tapping Delete Older Messages.

However, be cautious with this last option, as it will permanently delete older messages. If you often need to reference old messages, you may want to keep this setting on Forever to avoid losing important information.
FIND OUT WHY CELL PHONE COMPANIES NOW MUST BLOCK OBVIOUS SCAM TEXTS
Kurt’s key takeaways
Cleaning up your iPhone’s Messages app doesn’t have to be a chore. With these simple tips, you’ll not only declutter your inbox but also enjoy a more organized messaging experience. So go ahead—give these methods a try and reclaim your space.
Have you discovered any unique features or apps that help you keep your messaging organized? Let us know in the comments below.
TO GET MORE OF MY SECURITY ALERTS, SUBSCRIBE TO MY FREE CYBERGUY REPORT NEWSLETTER


