

The Notes app on the Apple iPhone is a great resource for making to-do lists, jotting down ideas, brainstorming, journaling, or writing private messages. So, the last thing you want is for someone to have access to those notes without your permission. To ensure utmost privacy and safeguard your valuable Notes on your iPhone, there are a few steps you can take to keep them exclusively for your eyes only.
To add protection for your iPhone notes
If you open your Notes app on your iPhone, you might notice that some of those notes are shared on your iCloud, while others are only listed under On My iPhone. The notes that are listed under On My iPhone can only be accessed if someone gets a hold of your iPhone and unlocks it. The notes listed under iCloud, however, can be accessed from any of your Apple devices.
Before you begin
- Update your iPhone to the latest version of iOS by going to Settings > General > Software Update. If there is a new version available, you can tap Download and Install to start the update process
- Turn on Notes in your iCloud Settings by going to Settings > [ your name ] > iCloud. Then turn on Notes
- Or make sure that you use Notes stored on your device. Notes accounts that sync from a third-party service, like Gmail or Yahoo, won’t include some Notes features and can’t be locked.
3 recommendations to keep your Notes protected
I recommend you do 3 things to keep your Notes protected:
- Lock your Notes on your iPhone
- Enable Two-Factor Authentication
- Enable Advanced Data Protection for your iCloud account
Credit: Apple
MORE: HOW TO SCHEDULE TEXT MESSAGES ON YOUR IPHONE AND ANDROID
1. Lock your Notes on your iPhone
You can lock individual Notes made in your Notes app. First, you’ll need to set your password preferences to lock your notes on your iPhone.
Choose a password for Notes in the Settings app
- In the Settings app, tap Notes
- Tap Password
- If you have multiple accounts, tap the account that you want to set a password for.
- Then, follow the prompts to either Use Device Passcode or Use Custom Password. If you choose to create a notes password, set a password hint
- If your device supports it, enable Face ID or Touch ID
Set up iCloud Keychain on iPhone
You may have to turn on iCloud Keychain as well if it’s not already on. iCloud Keychain provides an additional layer of privacy and security for your notes. When you enable iCloud Keychain, your notes are encrypted and stored securely in your iCloud account. This means that even if someone gains access to your iPhone, they won’t be able to view your locked notes without the iCloud Keychain password. To do this:
How to set up iCloud keychain on iPhone
- Go to Settings
- Click your Name at the top
- Select iCloud
- Tap Passwords and Keychain and make sure it is toggled on
To lock your Notes on iPhone
Once you’ve set your password and authentication preferences, you can now lock your notes.
How to lock your Notes on iPhone
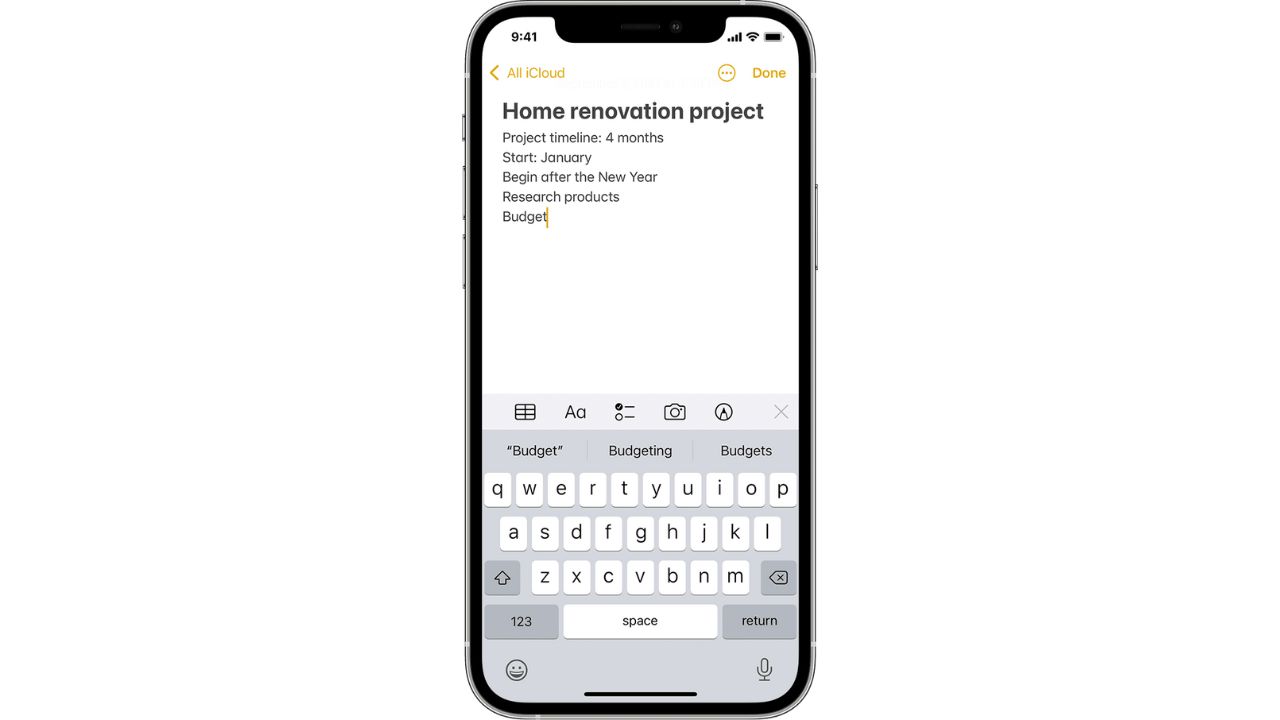
- Launch the Notes app from your Home screen
- Tap on an existing note or type into a new note
- Tap on the options menu on the upper right corner, which is the circle with dots inside it
- Tap Lock
- Enter your password, use Touch ID, or use Face ID to lock the note
- You will see a lock icon appear next to the note title indicating that the note is now locked.
How to open a locked note
- Tap the locked note
- Tap View Note
- Use Face ID or Touch ID, or enter your password
Your locked notes stay open for several minutes, making it easy for you to jump to another note, copy and paste information from other apps, and more. If you close the Notes app or your device goes to sleep, the note locks again.
How to remove the lock on your Notes on iPhone
- To unlock a note, tap the locked note
- Tap View Note
- Enter your password, use Touch ID, or use Face ID
- Tap on the options menu on the upper right corner, which is the circle with dots inside it
- Then tap Remove
2. Enable Two-Factor Authentication for your iCloud
Enabling Two-Factor Authentication for your iCloud account provides an additional layer of security to your account by requiring a verification code in addition to your password. When someone attempts to log into your iCloud account from an unfamiliar device, location, or web browser, you will receive a notification on one of your trusted devices with a verification code to enter. This way, even if someone has obtained your password, they won’t be able to access your iCloud account without the verification code. Here’s how to enable Two-Factor Authentication from your iPhone:
How to enable Two-Factor Authentication on iPhone
- Open your Settings app
- Click your name at the top
- Tap Password & Security
- Turn on Two-Factor Authentication if it is not turned on already
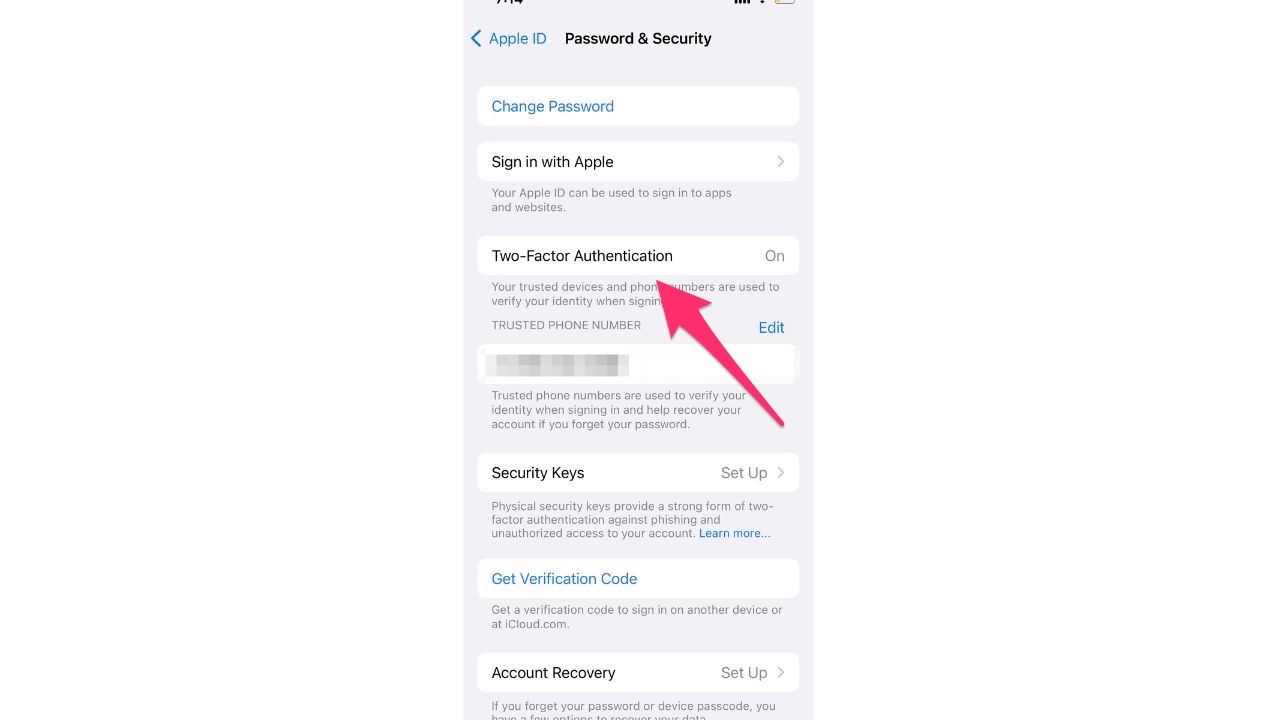
- Tap Continue and follow the onscreen instructions
FOR MORE OF MY SECURITY ALERTS, SUBSCRIBE TO MY FREE CYBERGUY REPORT NEWSLETTER HERE
3. Enable Advanced Data Protection for your iCloud on your iPhone
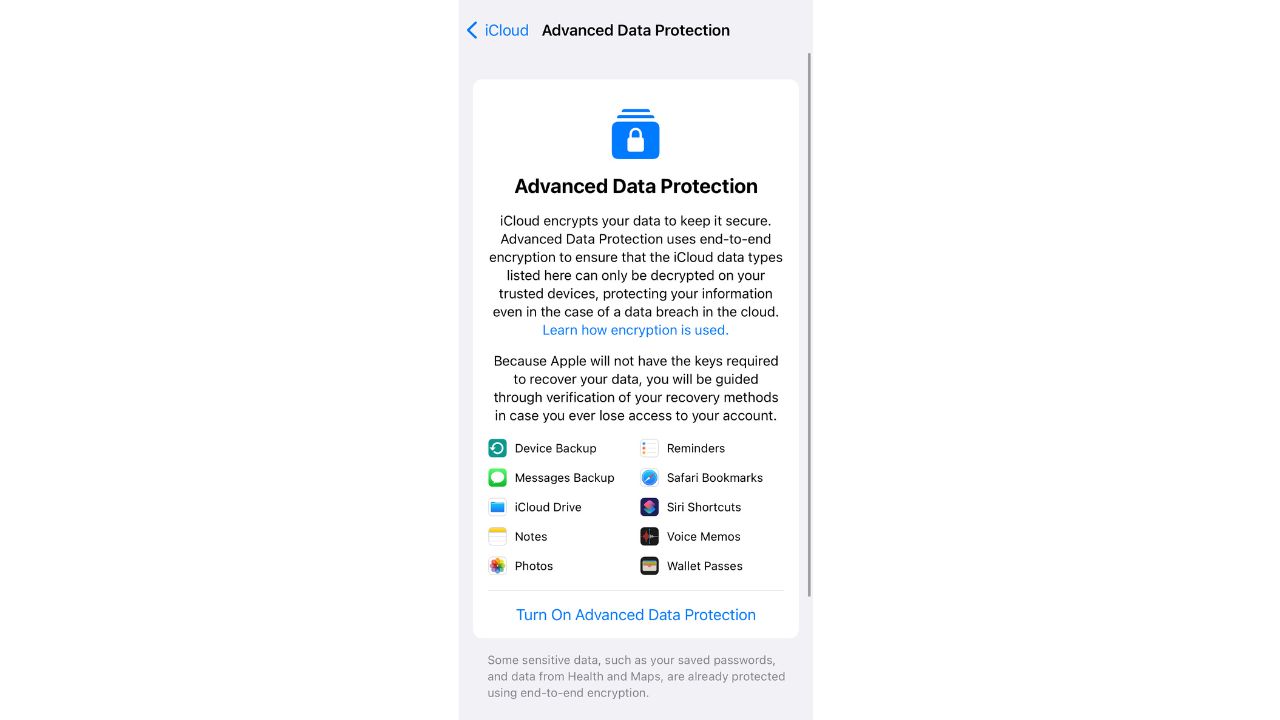
Another way you can add protection for your notes is by enabling Advanced Data Protection for your iCloud account. This is a newer feature on the iPhone that uses end-to-end encryption to ensure that the iCloud data in various apps on your phone, including the Notes app, can only be decrypted on your trusted devices. Here’s how to enable Advanced Data Protection on your iPhone.
How to enable Advanced Data Protection for your iCloud on iPhone
-
- Open your Settings app
- Click your name at the top
- Then, tap iCloud
- Scroll down, then select Advanced Data Protection
- Then, tap Turn On Advanced Data Protection
- Tap Review Recovery Methods and follow the onscreen instructions to review your recovery methods and enable Advanced Data Protection
Note: Before you turn on Advanced Data Protection, you’ll be guided to set up a least one alternative recovery method: a recovery contact or a recovery key. With Advanced Data Protection enabled Apple doesn’t have the encryption keys needed to help you recover your end-to-end encrypted data. If you ever lose access to your account, you’ll need to use one of your account recovery methods – your device passcode or password, your recovery contact, or recovery key – to recover your iCloud data.
MORE: 8 GREAT IPHONE ACCESSIBILITY TIPS TO MAKE LIFE EASIER
Watch the latest episode of The CyberGuy Report.

Missed this event? Sign up via the registration form and see our live recording.
See Kurt’s latest Amazon picks for useful gadgets, smart home upgrades and everyday tech worth grabbing while the deals last.
Kurt’s key takeaways
Safeguarding your Notes on your iPhone is crucial for maintaining your privacy and protecting your valuable information. By following these three recommendations—locking your Notes, enabling Two-Factor Authentication, and activating Advanced Data Protection for your iCloud account—you can ensure that your notes remain exclusively for your eyes only, even in the event of unauthorized access. Take the necessary steps to enhance the security of your iPhone Notes and enjoy peace of mind knowing your information is protected.
Do you like using iPhone’s Notes app, or do you prefer the old-school way of keeping track of things by writing them down with a pen and paper? Let us know by commenting below.
FOR MORE OF MY SECURITY ALERTS, SUBSCRIBE TO MY FREE CYBERGUY REPORT NEWSLETTER HERE
Related:
- How to schedule text messages on your iPhone and Android
- 8 great iPhone accessibility tips to make life easier
🎙 Now Streaming: My New Podcast: The CyberGuy Report
Kurt’s Top Deals
Deals move fast and inventory can be limited, so don’t wait too long.
| 🔥 Editor’s pick  Summer entertaining Ninja SLUSHi Machine (26% off) Frozen drinks and slushies at home in minutes. | |
| 💰 Top deal  Outdoor essential TYPEC Solar Bug Zapper (36% off) Solar-powered bug zappers for patios and camping. |

