

You’ve got questions? I’ve got answers.
Steve from Hartford, Connecticut who is baffled by Google’s settings recently sent in this email question. Here’s what he has to say:
I have my Google Web & Activity, Location History and YouTube History all set to off – yet they all show “paused”. Give me a break are they on or off? Why not have just a Toggle Switch? …They need to simplify their settings and explanations… Is there a book or guide out there in plain language that explains how to navigate and select the correct settings options throughout Google? – Steve, Hartford, CT
Hey Steve, I understand your confusion, and I am here to help make some sense of privacy settings. Navigating Google’s overly complicated privacy settings can be overwhelming to say the least. They incorporate many different methods to confuse and de-incentivize you from turning off their “money-making” settings.
For example, you noticed when you tried to turn something off, it said: “Paused.” This means the setting is off, but the phrase “Paused” could be interpreted that it will be turned back on at some point. This is just one example of the mind games these settings can play on Americans. Let’s try and simplify this process and help you with some steps to maximize your privacy within Google’s apps.
How to maximize your privacy within Google’s apps
Please note while these instructions can be performed within the Google Chrome browser, they can be performed essentially in any browser after you log into your Google account from within that browser. After logging in, the Google privacy screens are the same.
1. Turn off “web & app” activity
“Web & App” Activity is basically Google’s main tool to harvest all of your data. Leave this setting on, and Google interprets it as you giving them access to all of your online activity within their apps. They then sell this data to advertisers, profiting from your information.
When attempting to turn the setting off, Google warns that this may result in a less personalized experience. This is their attempt at getting you to keep handing over information. However, despite losing access to a few features in Maps and Google Assistant, the tradeoff appears to be worth it for the privacy boost.
How to turn “web & app” activity off using Mac
- On the Google Chrome page, click on your icon in the top right corner and select Manage your Google Account, or click on this link
- In the top left, click on Data & Privacy
- Scroll down and find the box that says History Settings
- In the box, the first row says Web & App Activity; Click on the blue check next to the word On
- Find the box that says Web & App Activity and click Turn Off on the right
- Select Turn off and Delete activity
- Click Next in the bottom right
- Select any Google products you wish to delete your activity by selecting its respective box to the right, checking it off, or clicking Select All in the top right to delete all activity
- Click Next and then Delete once you have confirmed you want to delete. Then tap Got it.
How to turn “web & app” activity off using a PC
- On the Google Chrome page, go to Activity controls in a web browser. To turn off web and app activity on your PC, you can access your Activity Controls in a web browser. If you’re not signed in to your Google account, you’ll be prompted to do so
- Click Turn Off under “Web & App Activity”. You’ll see this option near the top of the page
- Scroll down and click the Pause button. You won’t be able to click Pause until you’ve scrolled to the bottom of the page. This pauses your web and search activity until you enable it again. To delete your Web & App Activity history, click Delete old activity under “Setting is Off” and then select a time range. Click Got It when you’re finished to return to the previous screen.
How to turn “web & app” activity off using iPhone
- On the Google Chrome page, click on your icon in the top right corner and select your Google Account, select your account again on the next page and click Manage your Google Account. Or click on this link
- Then tap Data & Privacy near the top of the screen
- Scroll down and find the box that says History Settings
- In the box, the first row says Web & App Activity; Click on the > icon
- Find the box that says Web & App Activity and click Turn Off on the right
- Select Turn off and Delete activity
- Click Next in the bottom right
- Select any Google products you wish to delete your activity by selecting its respective box to the right, checking it off, or clicking Select All in the top right to delete all activity
- Click Next and then Delete once you have confirmed you want to delete. Then tap Got it.
How to turn “web & app” activity off using Android
- On the Google Chrome page, click on your icon in the top right corner and select Manage your Google Account, or click on this link
- Click on Data & Privacy
- Scroll down and find the box that says History Settings
- Find the row that says Web & App Activity and click the > icon
- Find the box that says Web & App Activity and click Turn Off on the right
- Select Turn off and Delete activity
- Click Next in the bottom right
- Select any Google products you wish to delete your activity by selecting its respective box to the right, checking it off, or clicking Select All in the top right to delete all activity
- Click Next and then Delete once you have confirmed you want to delete. Then tap Got it.

2. Limit data sharing with sites and services
This setting can be a bit conflicting for some folks. There are many valid reasons for allowing Google to give third-party apps and services access to your data. It’s extremely convenient and easy to use Google sign-in for other apps instead of creating a brand new account. It is enticing to click a button and have all your contacts linked with other apps rather than manually inputting each one.
However, allowing this does jeopardize your privacy. Google now knows whenever you sign into another app with your Google sign-in and which service. This makes for more easy data grabbing.
How to turn off data sharing with sites and services on Mac
- On the Google Chrome page, click on your icon in the top right corner and select Manage your Google Account, or click on this link
- In the top left, click on Data & Privacy
- Scroll down and find the box under the heading Data from apps and services you use
- Click on Third-party apps & services
- Select any apps you wish to get rid of Google’s connections with
- Click the box on the bottom that says Delete all connections you have with [website] and click confirm
How to turn off data sharing with sites and services on PC
- On the Google Chrome page, click the menu icon (three dots) at the top-right corner and select Settings
- Then, click Privacy and security
- Next, tap Site settings
- Here, you can manage how Chrome handles cookies, location, camera, microphone, notifications, and other permissions for different sites
- You can also clear your browsing data and disable third-party services from accessing your data
How to turn off data sharing with sites and services on iPhone
- On the Google Chrome page, click on your icon in the top right corner and select your Google Account, select your account again on the next page and click Manage your Google Account. Or click on this link
- Click on Data & Privacy
- Scroll down and find the box under the heading Data from apps and services you use
- Click on Third-party apps & services
- Scroll down and select any apps you wish to get rid of Google’s connections with by clicking on it
- Next, scroll down and click the box on the bottom that says Delete all connections you have with [website] and click confirm
How to turn off data sharing with sites and services on Android
- On the Google Chrome page, click on your icon in the top right corner and select Manage your Google Account, or click on this link
- Click on Data & Privacy
- Scroll down and find the box under the heading Data from apps and services you use
- Click on Third-party apps & services
- Select any apps you wish to get rid of Google’s connections with by clicking on it
- Click the box on the bottom that says Delete all connections you have with [website] and click confirm
3. Turn off Location History
This one is pretty self-explanatory. With it on, Google stores the places you go and collects your location data. However, the tricky thing with this setting is that you must have Web & App activity turned off for your Location History to be fully turned off.
How to turn it off on Mac
- On the Google Chrome page, click on your icon in the top right corner and select Manage your Google Account, or click on this link
- In the top left, click on Data & Privacy
- Scroll down and find the box that says History Settings
- Click on the row that says Location History
- Click on the box that says Turn off
- Select Turn off again and then Got it
How to turn “web & app” activity off using a PC
- On the Google Chrome page, go to Activity controls in a web browser. To turn off web and app activity on your PC, you can access your Activity Controls in a web browser. If you’re not signed in to your Google account, you’ll be prompted to do so
- Click Turn Off under “Web & App Activity”. You’ll see this option near the top of the page
- Scroll down and click the Pause button. You won’t be able to click Pause until you’ve scrolled to the bottom of the page. This pauses your web and search activity until you enable it again. To delete your Web & App Activity history, click Delete old activity under “Setting is Off” and then select a time range. Click Got It when you’re finished to return to the previous screen.
How to turn it off on iPhone
- On the Google Chrome page, click on your icon in the top right corner and select your Google Account, select your account again on the next page and click Manage your Google Account. Or click on this link
- In the top left, click on Data & Privacy
- Scroll down and find the box that says History Settings
- Click on the row that says Location History
- Click on the box that says Turn off
- Select Turn off again and then Got it
How to turn it off on Android
- On the Google Chrome page, click on your icon in the top right corner and select Manage your Google Account, or click on this link
- In the top left, click on Data & Privacy
- Scroll down and find the box that says History Settings
- Click on the row that says Location History
- Click on the box that says Turn off
- Select Turn off again and then Got it
MORE: GOOGLE CHROME’S “INCOGNITO” MODE MIGHT NOT KEEP YOU SO HIDDEN
How to turn on Auto-delete controls
Auto-delete controls let you automatically delete your data on a continuous rolling basis of 3, 18, or 36 months without needing to do this manually. This feature is available for your Location History and Web & App Activity data. To activate this feature for Location History data, which includes the places you go with your devices and the routes you take, follow these steps:
- On the Google Chrome page, click on your icon in the top right corner and select Manage your Google Account, or click on this link
- Under the privacy and personalization section, click on Manage your data & privacy
- Scroll down and select Location History
- Tap on Manage Activity
- Choose Auto-delete and select a time limit for how long you want your data saved. You can choose 3 months, 18 months, or 36 months.
- Confirm your choice and click on the Next button and then Confirm
To activate Auto-delete controls, for Web & App Activity data, follow these steps:
- On the Google Chrome page, click on your icon in the top right corner and select Manage your Google Account, or click on this link
- Under the privacy and personalization section, click on Manage your data & privacy
- Scroll down and click on Web & App Activity
- Tap Manage all Web and app
- Choose Auto-delete and select a time limit for how long you want your data saved. You can choose 3 months, 18 months, or 36 months.
- Confirm your choice and click on the Next button and then Confirm
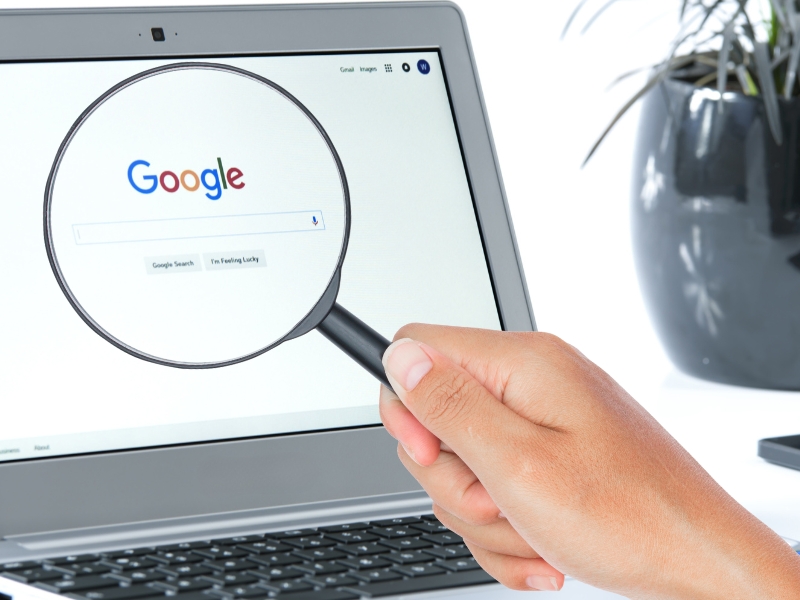
4. Getting your personal information off Google search
If you have ever looked yourself up on Google, there is a chance some results popped up that you were not too fond of. It can be an odd feeling to see information you do not remember disclosing appear online for all to see. This is often the result of search engines selling your intimate data to anyone willing to pay.
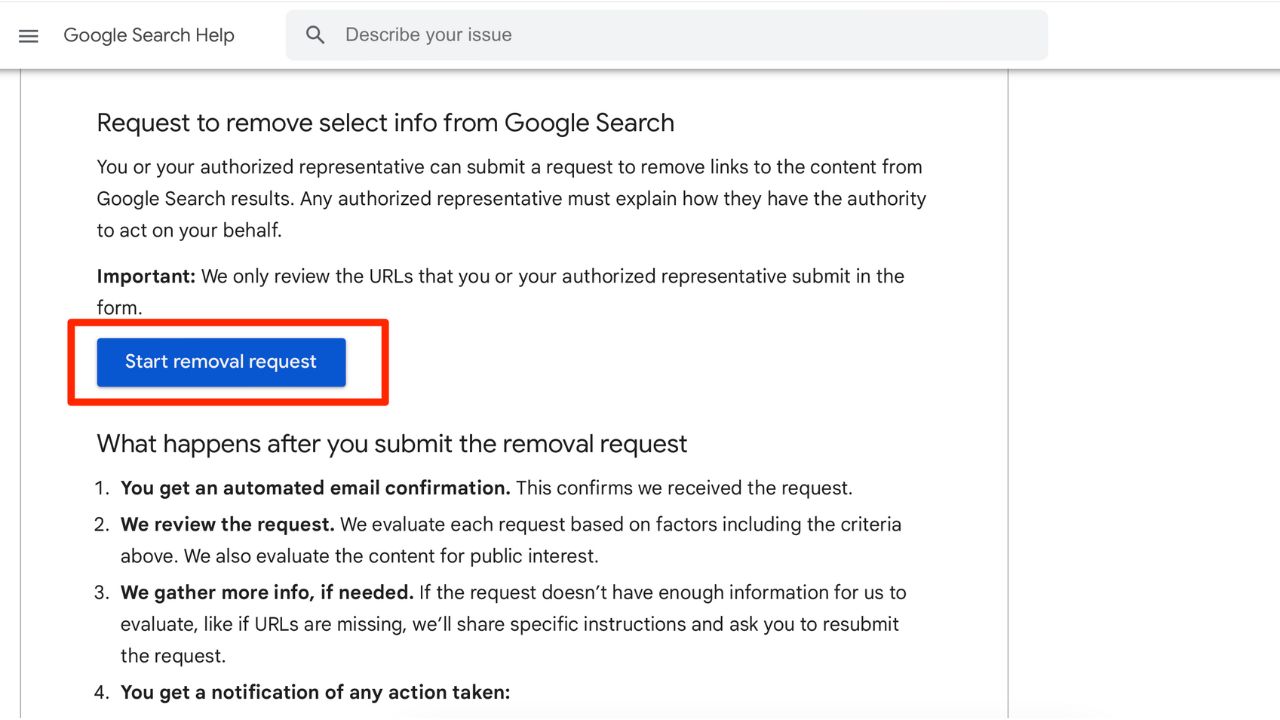
A new tool on Google helps with this issue. You can ask Google to stop presenting this data in its search results, making your specifics much harder to locate. The websites with the information may still be active, but they will be more difficult to find.
An online form, linked here, lets you select which of your data you want off the web. You must supply the URLs of the pages featuring this information, and screenshots are also encouraged. Click Start Removal Request and fill out the form.
MORE: HOW TO SCRUB YOURSELF OFF THE INTERNET
5. Stop targeted ads
If Google’s scarily specific ads creep you out, you are not alone. Don’t worry, as there is a way to turn them off. Here’s how:
How to stop targeted ads on Mac
- On the Google Chrome page, click on your icon in the top right corner and select Manage your Google Account, or click on this link
- In the top left, click on Data & Privacy
- Find the box that is titled Personalized ads and click on My Ad Center
- In the top right corner, click on the box that says Personalized ads and then click on Turn Off in the bottom right of the next box. Then tap Got it.
How to stop targeted ads on iPhone
- On the Google Chrome page, click on your icon in the top right corner and select your Google Account, select your account again on the next page and click Manage your Google Account. Or click on this link
- Click on Data & Privacy
- Find the box that is titled Personalized ads and click on My Ad Center
- In the top right corner, click on the box that says Personalized ads and then click on Turn Off in the bottom right of the next box. Then tap Got it.
How to stop targeted ads on Android
- On the Google Chrome page, click on your icon in the top right corner and select Manage your Google Account, or click on this link
- Click on Data & Privacy
- Find the box that is titled Personalized ads and click on My Ad Center
- In the top right corner, click on the box that says Personalized ads and then click on Turn Off in the bottom right of the next box. Then click Got it.

6. Further privacy protection using a VPN
Consider using a VPN to protect against who can track you and identify your potential location on websites that you visit. Many sites are able to read your IP address and, depending on their privacy settings, may display the city from which you are corresponding. A VPN will disguise your IP address to show an alternate location.
My top recommendation is ExpressVPN. It has a quick and easy setup, is available in 94 countries, and will not log your IP address, browsing history, traffic destination or metadata, or DNS queries.
Right now, you can get 3 extra months FREE with a 12-month ExpressVPN plan. That’s just $6.67 per month, a saving of 49%! Try 30 days risk-free.
Read more of my reviews for best VPNs here
Kurt’s key takeaways
When it comes to protecting your privacy online, taking control of your Google activity is a smart move. Remember, just a few clicks can make a big difference. So go ahead and bid farewell to unwanted data sharing, location history, and those pesky targeted ads. And for an extra layer of privacy, consider a trustworthy VPN to keep your online presence under wraps. Stay savvy, and stay secure.
Do you believe that there should be stricter regulations around data security? What do you think should be done? Let us know by commenting below.
FOR MORE OF MY TECH TIPS & SECURITY ALERTS, SUBSCRIBE TO MY FREE CYBERGUY REPORT NEWSLETTER HERE
Ask Kurt a question or let us know what stories you’d like us to cover
Answers to the most asked CyberGuy questions:
- What is the best way to protect your Mac, Windows, iPhone, and Android devices from getting hacked?
- What is the best way to stay private, secure, and anonymous while browsing the web?
- How can I get rid of robocalls with apps and data removal services?
🛍️ SHOPPING GUIDES:
KIDS | MEN | WOMEN | TEENS | PETS |
FOR THOSE WHO LOVE:
COOKING | COFFEE | TOOLS | TRAVEL | WINE |
DEVICES:
LAPTOPS | TABLETS | PRINTERS | DESKTOPS | MONITORS | EARBUDS | HEADPHONES | KINDLES | SOUNDBARS | KINDLES | DRONES |
ACCESSORIES:
CAR | KITCHEN | LAPTOP | KEYBOARDS | PHONE | TRAVEL | KEEP IT COZY |
PERSONAL GIFTS:
PHOTOBOOKS | DIGITAL PHOTO FRAMES |
SECURITY
ANTIVIRUS | VPN | SECURE EMAIL |
CAN'T GO WRONG WITH THESE:
19 comments
What if I use Firefox instead of Chrome to reach my Google accounts? We don’t all use Chrome so it would be helpful in your future suggestions to include all of the other systems such as Firefox and Safari.
Hi Sandi. Great question. Please note while these instructions can be performed within the Google Chrome browser, they can be performed essentially in any browser after you log into your Google account from within that browser. After logging in, the Google privacy screens are the same.
Thank you very much. The links for Android helped greatly.